Self-Driving This African Country Is Easier Than You’d Think — Here’s What First-Timers Need to Know


Thinking about self-driving in Namibia but not sure if it’s doable or safe? I felt the same before our trip. But after almost a month in a 4×4 with a roof tent, I can honestly say it’s one of the best ways to see the country.
James and I spent three and a half weeks exploring places like Sossusvlei, Etosha, and Spitzkoppe, tackling long, dusty roads that were tiring at times but completely worth it.
I won’t sugarcoat it: self-driving in Namibia isn’t always easy. The drives are big, the roads can be rough, and you’ll definitely earn your cold beer at the end of the day. But the freedom you get makes it all worth it. You can stop where you want, chase sunsets, and explore at your own pace.
Whether you’re with friends, your partner, or going solo, Namibia is made for this kind of adventure. And if driving isn’t your thing, there are solid group tours too.
This guide covers everything you need to know, from choosing a car to handling gravel roads and the exact route we took.
Why I Think Self Driving Is A Great Way To Explore Namibia
Call me biased because this is how we explored, but I honestly can’t imagine our trip being half as good if we hadn’t driven ourselves.
I was actually terrified before we arrived. I’m not the most confident driver, and the thought of driving endless gravel roads in a 4×4 sounded like a lot. My heart rate was through the roof on my first drive!
But it quickly became one of my favourite parts of the trip (except for the seven hour drives, but thankfully those were rare).
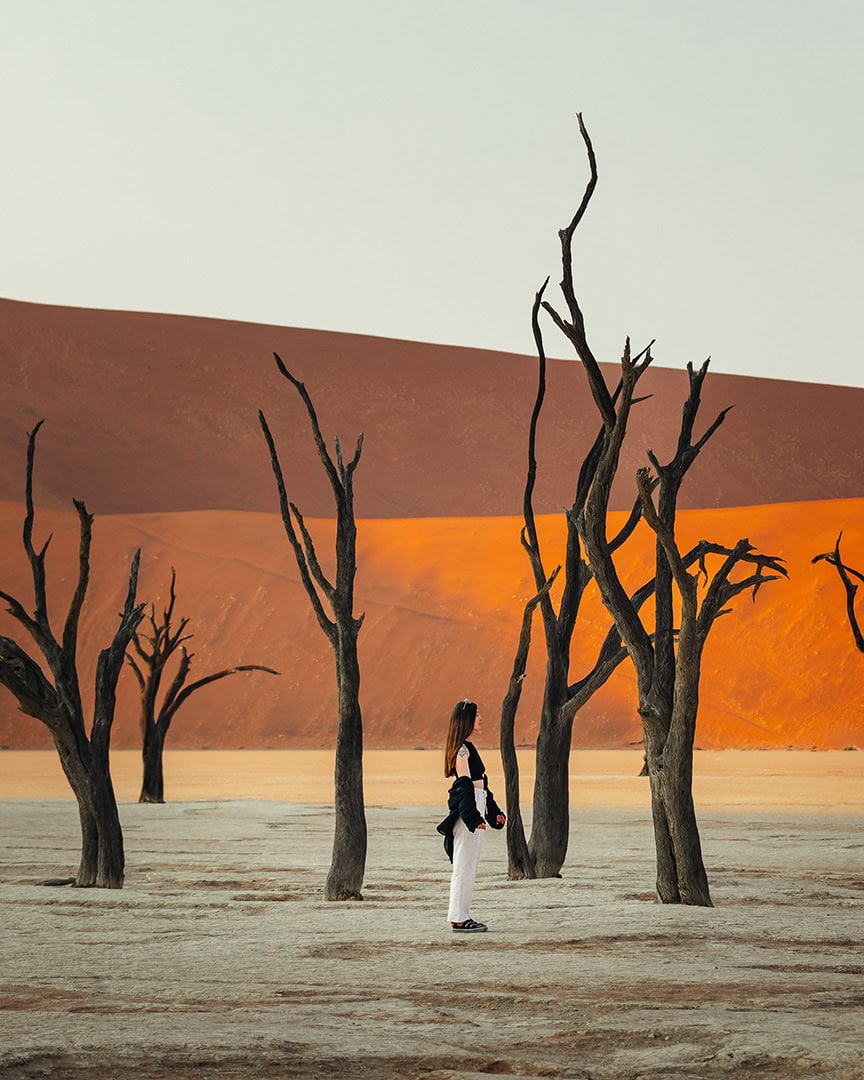
If we hadn’t self driven, we wouldn’t have been able to sit for hours at Etosha’s waterholes waiting for lions to appear, or wake up at sunrise and head straight to Deadvlei while everyone else stopped at Dune 45. Even being able to just stop for a coffee or bathroom break when we needed to sold it to me.
I don’t think you can put a price on having the freedom to do what you want when you want, especially for someone like me who hates sticking to a strict schedule.
I’m not shitting on group tours, they’re a great option if you don’t want to or can’t drive, but they do come with limits and set itineraries. When you’re in your own car though, you get to set the pace, choose your stops, and get to experience Namibia exactly how you want to.
Your Options For Self Driving
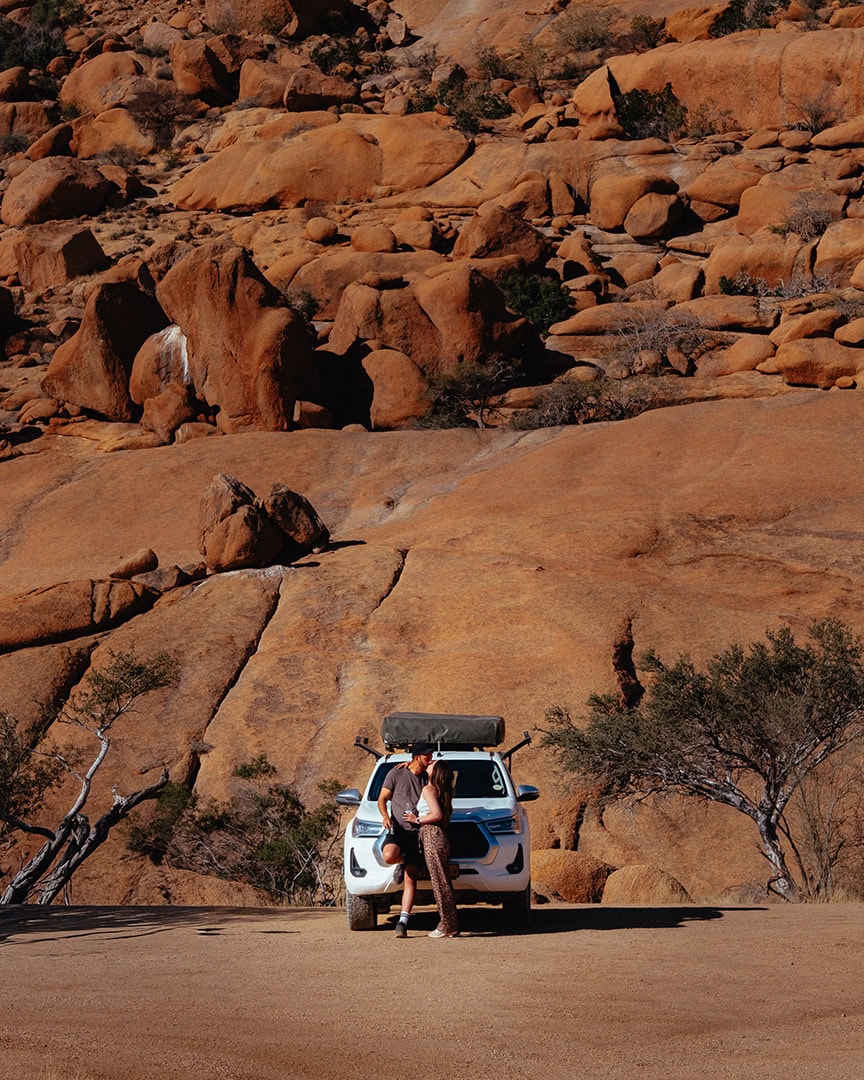
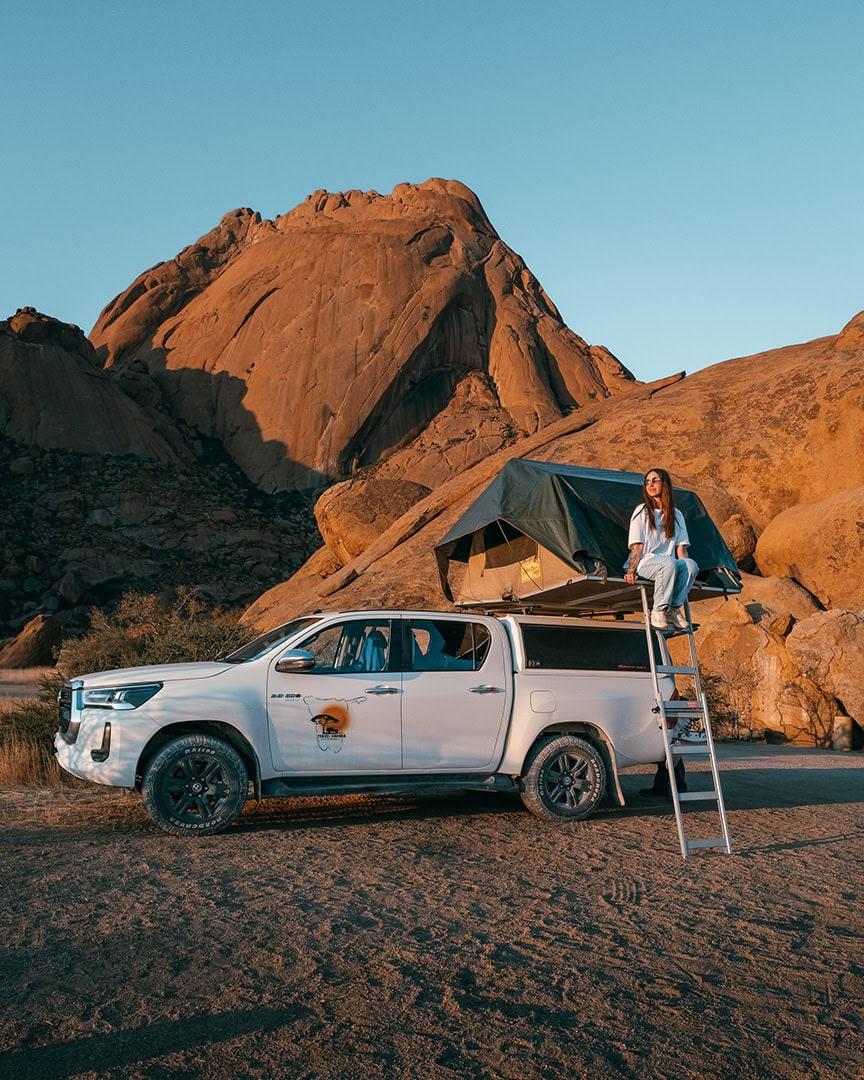
We actually spent quite a while weighing up whether to rent a car or a camper with a roof tent. We knew we wanted to stay in some remote spots to watch the stars and try proper off-grid camping. Plus, we’d never slept in a roof tent before, so that was what decided it for us. Also, I just loved how cool the roof tents looked in pictures!
We also wanted to keep costs down where we could, and even though the camper was pricier to rent, it worked out cheaper overall since we weren’t paying for accommodation every night.
Whichever option you go for, I’d still recommend getting a 4×4. Some of Namibia’s roads are fine, but plenty are bumpy and sandy, so having four-wheel drive helps a lot!
Camper
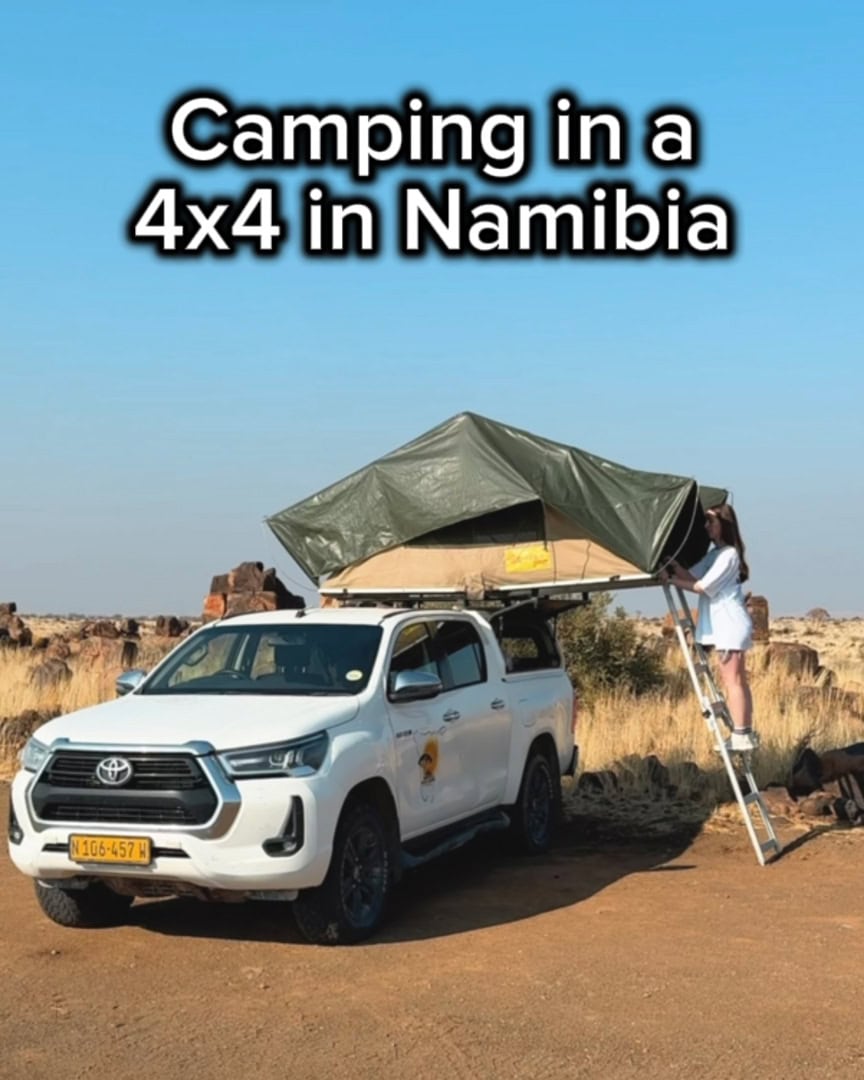
This is the option we went for, and I absolutely loved it. There are a few different styles of camper you can rent, but we chose a 4×4 with a roof tent because a full-blown camper van was way out of our budget, and we still need to eat!
We booked our camper with Travel Namibia 4×4 and they were amazing!
Most campers come with a gas cooker, small fridge, utensils, and braai (BBQ) gear, so you’re pretty much set up from day one. Campsites vary a lot in price, from around £5 to £30 per person per night depending on the facilities and location. We mixed it up by booking a room every five days or so for a proper shower and a comfy bed.
The only thing with camping is that you will be dusty all the time. No matter how hard we tried, sand and dust always found their way into the tent. It wasn’t something that really bothered us, but it’s worth keeping in mind if that kind of thing drives you mad.
Here’s a quick look inside our 4×4 camper in the video below!
Car
When we go back to Namibia (because we absolutely will), I’d actually be tempted to go for this option next time. It’d be nice to end each day in a lodge or guesthouse, although I’d happily do the roof tent again too.
If you go for a car, you’ll need to plan your accommodation or bring or rent your own camping gear so things like a tent, sleeping bags, and the rest.
I’d still go for a 4×4 even if you’re sticking to main routes. It makes a huge difference when you come across unexpected gravel or sandy patches.
When checking for car rental prices, make sure you have set the filter to unlimited mileage and 4×4.

The Best Time For A Self Drive Trip
For us, the dry season (roughly April/May to October) was the best time to visit. We really wanted to see lots of wildlife in Etosha, so we went in September, towards the end of the dry season.
It was slightly cheaper than the peak months of July and August, but we still saw loads of animals and only had a bit of rain in Swakopmund, which is pretty normal that time of year anyway.
We decided against travelling in the wet season (December to March) because road conditions can get tricky, and with some areas becoming harder to access, we didn’t want to risk missing anywhere on our route. Plus, the humidity can be intense, which isn’t exactly my idea of fun for camping (or for my very frizzy hair!).
We also skipped the high season months of June, July, and August. They’re amazing for wildlife and clear skies, but prices jump quite a bit, and campsites book up fast. We decided we could still get the same experience in September, just with fewer crowds and slightly cheaper prices.
To be honest, I’m not sure how you could see more wildlife than we did anyway, and we saw everything we wanted (including the three big cats, leopard, cheetah and lions).
When I go back, I’ll probably choose April. It’s just after the rains, so the landscape is still a bit green, the roads are easier to manage, and everything looks fresh before the full dry season kicks in.
Self Driving Tips
After a few thousand kilometres on Namibia’s gravel roads, we picked up plenty of lessons along the way, some we already knew about, and others were a bit unexpected.
Here are the self driving tips that would’ve saved us a few headaches if we’d known them earlier.
Always Carry Your Driving Licence
It’s the law in Namibia to have your driving licence on you at all times while driving. We didn’t find this to be an issue since, realistically, you’ve got all your stuff in the car with you most of the time anyway.
But if you’re staying in one place for a few nights and heading out on day trips, make sure your licence is in your day bag.
Keep Your Tank Topped Up
When I say you’ll be driving long distances, believe me, you’ll be driving far. It’s not unusual to go hundreds of kilometres without seeing another town, never mind a petrol station.
We made a habit of topping up at the end of every long drive or before setting off again, just to be safe, as we didn’t always know where the next petrol station would be.
Most 4×4 campers have a backup fuel tank, but not all rental vehicles do, so double-check with your company before you get on the road. Namibia’s not somewhere you want to test how far you can get on red.
Get Used To Gravel Roads
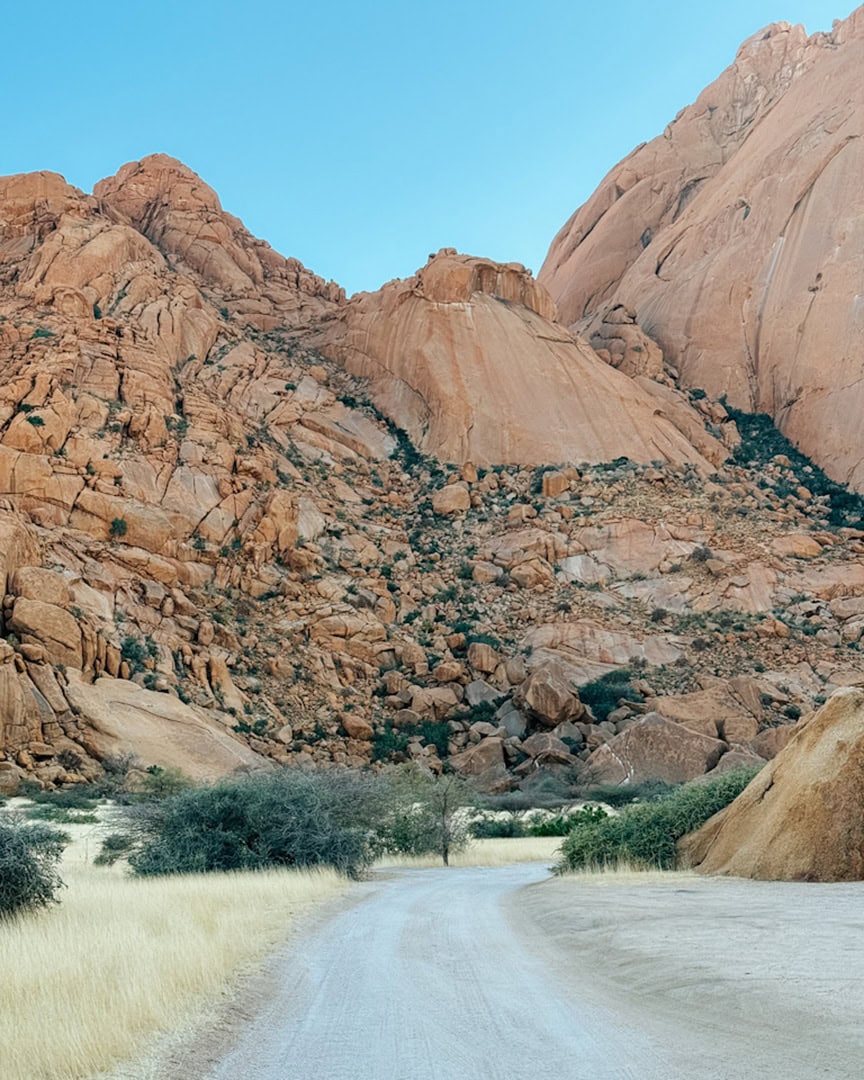
I’d read about Namibia’s gravel roads before the trip, but I definitely underestimated just how long they’d be until we were actually driving them. Some are smooth and well-kept, but others are full of potholes, loose rocks, and endless bumps that make your teeth chatter.
They’re not all bad, but take it slow, 80 km/h is about as fast as you’ll want to go, and on the rougher stretches, you’ll probably be doing half that while dodging holes.
Also, try to keep at least six car lengths between you and the car in front. The dust clouds can be thick, and if someone brakes suddenly, you’ll need time to actually see and react.
It’s better to take your time, as your back wheels can skid out pretty fast (as we found out!).
Only Drive Between Sunrise & Sunset
This one might not surprise you, as Namibia isn’t the only country with this rule, but driving after dark is a big no-go. Most rental insurance won’t cover you if something happens between sunset and sunrise, it’s just not worth the risk.
Wildlife is way more active at night, visibility drops fast, and you do not want to be swerving to avoid an oryx in the dark. Stick to daylight hours, as it keeps both you and the animals safe.
The only real exception to this is Sossusvlei. If you’re staying inside the park gates, you’ll probably need to set off before sunrise to reach Deadvlei or Dune 45 in time for first light.
Our rental company were happy for us to do this and actually recommended it, they just asked that we take extra care on the drive.

Watch Out For Wildlife
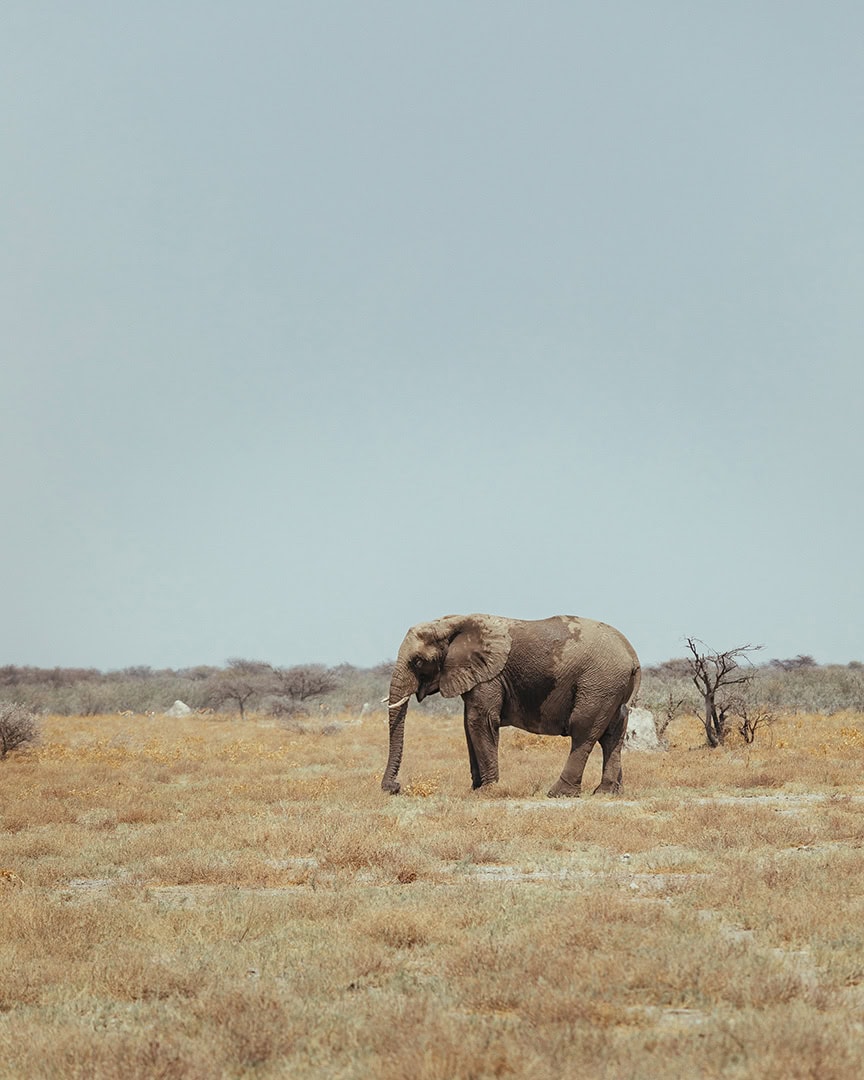
This one’s probably pretty obvious, but wildlife is everywhere in Namibia! Even though many roads are fenced, animals still find their way through, and it’s not uncommon to see them wandering across or grazing by the roadside.
And it’s not just out in the middle of nowhere that you need to be alert! We saw baboons, oryx, and warthogs near towns, and even the odd goat traffic jam. Just keep your eyes peeled and slow down when you spot movement ahead.
Keep Headlights On Even In The Daytime
This was one we didn’t actually know before arriving. It’s not totally unheard of as Iceland has a similar rule, but outside of cities and towns in Namibia, it’s law to have your headlights on during the day.
I’m guessing it’s partly because of the dust (visibility can drop fast) and also to help with spotting wildlife on the roads.
We had our lights on auto, so we assumed they stayed on all the time… but it turns out they only came on automatically in low light. Luckily, we realised pretty quickly and knew we had to actually switch them on.
It’s worth sticking a little reminder on your dashboard if you’re worried you might forget.

Whatever Maps Tells You, Add Extra Time
We learned this one the hard way. On our drive from Lüderitz to Sossusvlei, Maps told us we’d arrive by 4:30 p.m. which seemed perfect! Loads of time to get through the park gates (which close at sunset), set up camp, and make dinner. How wrong I was.
The roads were so bumpy we had to slow right down, and we didn’t get through the gate until gone 6 p.m.
We still made it with a bit of time, but I spent half the drive watching our ETA creep later and later, worrying we wouldn’t reach camp before dark. We even skipped lunch just to keep going!
Lesson learned but I’d say always add at least an extra hour to whatever Maps tells you. It doesn’t factor in the gravel roads or how often you’ll have to slow right down.
Our Route & Where We Went
We covered well over 3,000 km in about three and a half weeks around Namibia. The goal was to see as much as we could without feeling like we were constantly on the move and burning ourselves out.
This did mean that we skipped the Caprivi Strip (we’re saving it for next time), but here’s the route we took, and what each part of the drive was actually like.
Windhoek → Fish River Canyon
~6.5 hrs | Tar + Gravel
This was one of the longer legs, but honestly, it’s a great warm-up for driving the big 4×4, which I was shitting myself about. Most of the road was tarmac and really easy to handle.
We hit our first stretch of gravel about an hour before arriving at Fish River Canyon, but thankfully, it was in really good condition when we visited, and we had no issues at all.

Fish River Canyon → Luderitz
~4.5 hrs | Gravel + Tar
The first part of the drive retraces your route back along the same gravel road you came in on, so hopefully nice and easy again. Once you reach the tar road, it should be a smooth and straightforward drive toward Lüderitz.
You’ll pass through the tiny town of Aus, which is the perfect spot to stop for a drink and stretch your legs before the last couple of hours drive.
From there, the road is mostly paved until you reach the sand dunes just outside of Luderitz. The sand does blow across the road, so it’s best to slow down a bit here to be safe.
Luderitz → Sossusvlei
~6 hrs | Tar + Gravel
Even though Maps says six hours, I’d say it’s closer to seven, so be prepared for a full day of driving. This was actually the toughest day for us, to be honest.
You’ll start by heading back along the tar road towards Aus before turning off onto gravel for the rest of the journey.
Maps will probably suggest taking the C13 and C27, but we were told by someone we met in Luderitz to try the D707 instead, as the C roads can be pretty torn up.
We did, and it was a great call. The D707 runs along the edge of the Namib Desert, and while it’s still gravel, the road conditions were decent, and the scenery is absolutely stunning.
Sossusvlei → Swakopmund
~6 hrs | Tar + Gravel
This one actually started out pretty well, the first stretch of gravel was in decent shape when we did it, and we passed some really stunning mountain scenery along the way.
We stopped at Solitaire and were pleasantly surprised by the roadside café there, they even had a few vegan options, so of course, we had to stop for lunch.
After that, things got a bit tougher. The road winds through twisty, rocky canyons, and we had to slow to a crawl in some sections. It’s a scenic drive, but definitely not one to rush.
The final stretch is beautiful though, the tar road leading up to Swakopmund runs right between the ocean and the sand dunes.
Swakopmund → Spitzkoppe
~2 hrs | Tar + Gravel
This was a really nice drive, most of the way is on tarmac, and it’s only the last 25 minutes or so that turns to gravel. Even then, the road was in good condition when we did it.
You can spot Spitzkoppe from miles away, and it’s worth pulling over a few times along the way to grab some photos as the views are incredible.
Just a quick heads-up though: on this final stretch, we had a guy try to scam us by claiming his petrol tank had leaked and he needed 200 NAD. He offered to “repay” us with some gemstones, which sounded dodgy straight away.
There was no petrol under his car, and taking gemstones out of Namibia without permission from the commissioner is actually illegal.
Spitzkoppe → Damaraland
~3 hrs | Gravel
This drive should take around three hours, unless, like us, you start driving in the wrong direction and make it four! Definitely make sure your map is preloaded before you leave Spitzkoppe. We managed to get a tiny bit of signal up at reception, so I’d recommend loading your route there before leaving.
Most of this route is gravel, and is pretty shit to be honest. There was one section with massive rocks sticking out of the road that you couldn’t really spot until you were right on top of them.
I reckon rivers must also run through parts of it during the wet season, so if it rains while you’re there, keep an eye out for washouts.
Damaraland → Etosha (Namutoni Gate)
~5.5 hrs | Gravel + Tar
This was one of our longer drives because we decided to start our Etosha visit at the Namutoni Gate since we were also heading to the Onguma Reserve. If you’re starting at Anderson Gate, it’s a much shorter trip, around three hours.
You’ll start off on gravel again, and while some sections are a bit bumpy, they’re nowhere near as bad as the stretch between Spitzkoppe and Damaraland (thankfully). About halfway through, you’ll get back onto tar roads, and from there, it’s pretty easy.
You can stop in Outjo to grab a drink and stretch your legs, or do what we did and stay the night there to break up the drive (shout out to Sasa Safari Lodge, we loved it here!).

Etosha (Anderson Gate) → Windhoek
~4 hrs | Tar
This stretch of road felt like a breeze after the long drives on the gravel roads as it was fully tarred and easy to drive. You’ll pass some lovely scenery along the way, and if you fancy a detour, the Waterberg Plateau is just off this route.
As you get closer to Windhoek, the roads start to get busier, which felt a bit strange after so many days of quiet, dusty drives.
Keep an eye on your speed (as you should anyway), but especially here, as we noticed quite a few speed cameras on this section.
Packing Essentials for a Self Drive in Namibia
You’ll find loads of packing lists online, but here are the not-so-obvious things I’m really glad we had (and a few I wish we’d thought of sooner).
🧥 A Warm Jacket — Sounds mad, right? But Namibia gets freezing at night. I was so glad I threw mine in last minute!
🔌 Multi-Port Car Charger — A total lifesaver for keeping phones and cameras charged on long drives. We got one with four ports and used it constantly.
🗺️ Offline Google Maps — Signal can be really patchy in parts of Namibia, so download your maps before you go.
🧻 Biodegradable Wet Wipes — After a full day of dust and gravel and being too tired to go shower, these were the only thing keeping me sane before bed.
💧 Water Purifying Tablets (or a Filter Bottle) — Some remote campsites don’t have drinkable water, so bring something to make it safe. Trust me, you don’t want to get sick when there’s one shared toilet for the campsite.
🦟 Insect Repellent — You might not need it everywhere, but near waterholes or at dusk, the mozzies make an appearance.
⛑️ First Aid Kit — I ended up getting blisters from my new sandals, so having plasters was a lifesaver.
💡 Head Torch — Don’t rely on your phone light. James had to come with me to the loo in Spitzkoppe and hold the torch over the door because I had nowhere to rest it. A head torch would’ve been so much easier.

Which Transport Option I Recommend
If it’s your first time visiting Namibia, I’d honestly say go for the roof tent camper. It’s such a unique way to explore, and I’m so glad it’s what we chose. Waking up in wild landscapes every morning and having everything you need right in your car just made the whole trip for me.
If you’ve got a big budget (which we definitely didn’t), I’d still stick with the camper, but if you can, mix in a few nights at some of the eco-lodges too. They look bloody unreal (a girl can dream though, right?).
If you prefer a bit more comfort at the end of each day, renting a car and staying in lodges or guesthouses might suit you better.
But if you’re up for a little dust, a lot of freedom, and camping in what feels like the middle of nowhere, the camper wins hands down (for me!).
We booked our 4×4 through Travel Namibia 4×4, and I honestly can’t recommend them enough. Their service was next to none, and Johan and his team genuinely cared about the experience we had. Everything was super straightforward from start to finish, and the setup had everything we needed for our three-and-a-half-week adventure.