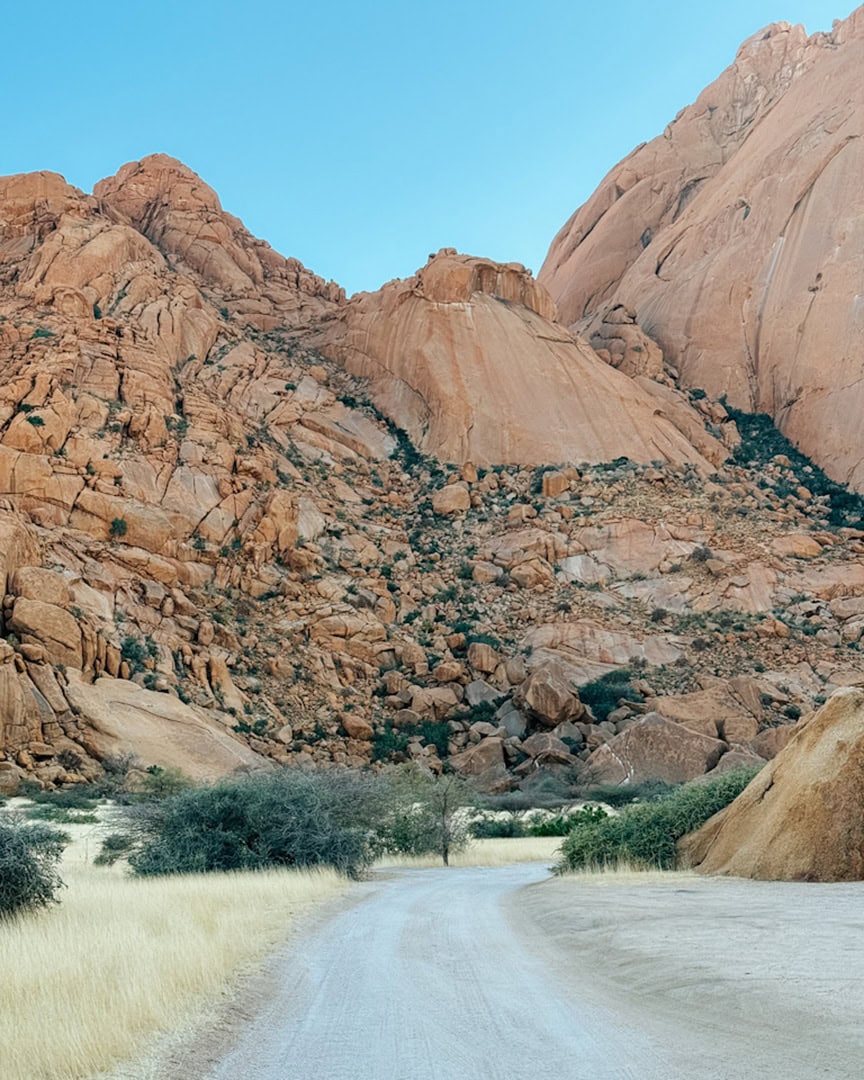
3 Weeks in Namibia: A Journey Through Empty Roads, Desert Skies, and Wildlife Straight Out of a Documentary


Planning your first Namibia road trip can feel a bit brutal. The distances are huge, the best route isn’t obvious, and Google Maps gets a little too confident once the gravel roads start.
I know because I spent hours spiralling over drive times and detours (and yes, questioned our life choices more than once). In the end, we did 25 days in Namibia, including 22 days living out of a 4×4 camper, so this itinerary is built on what actually worked, plus what I’d tweak next time.
You’ll still get a couple of big drive days (our longest was 8 hours), but there’s enough breathing room to properly explore, not just hop out for a photo and move on.
If it’s your first Namibia self-drive and you want a realistic plan for where to go, where to stay (campsites + accommodation), and what the drives are really like, this has you covered, including Sossusvlei, Etosha, Spitzkoppe, and a few stops people weirdly skip.
Our 3 Week Route at a Glance
If you’re planning 21 days in Namibia, this is the exact route I’d recommend for a first-time road trip.
There are a couple of 6–8 hour drive days, but I’ve spaced things out so you’ve got plenty of time in between to recover and actually enjoy the places you’re driving all that way to see.
- Day 1: Windhoek
- Day 2: Quivertree Forest
- Day 3: Fish River Canyon
- Day 4–5: Lüderitz
- Day 6–8: Sossusvlei & Deadvlei
- Day 9–11: Swakopmund & The Skeleton Coast
- Day 12–13: Spitzkoppe
- Day 14: Damaraland
- Day 15: Outjo (quick overnight stop)
- Day 16–18: Etosha National Park
- Day 19–20: Waterberg Plateau
- Day 21: Windhoek
Rough distance: About 3,500 km
Transport: Self-drive 4×4 with rooftop tent
Trip style: Mostly camping, with the odd lodge night for a treat
Quick note: Campsites and 4x4s get booked out fast! Try to book these in advance.

Our Day by Day Namibia Itinerary
We mostly camped throughout the trip, but we did break it up with a couple of hotel stays too (we’re in our mid 30s now, and our backs need a bit of TLC).
I’ll share both campsite and hotel options for each stop so you can mix and match depending on where you want to stay.
Day 1: Windhoek
🚗 Drive Time: N/A
🛣️ Road Type: City roads
🎯 Must-Do: Stock up on supplies, eat out, explore Windhoek
💡 Tip: Delay camper pickup if you arrive late to save money
You’ll land in Windhoek today, so whether or not you pick up your camper depends on what time you arrive. If it’s late (like ours was), I’d wait until the next morning. There’s no point paying for a day you won’t really use.
I actually really liked Windhoek! After the long flight, we didn’t want anything fancy, we just wanted some decent food and to feel human again. We ended up at Seoul Food on our first night, and it was exactly what we needed. They had great vegan options, and the staff were so lovely.
This is also your moment to get organised. Do your first big supermarket run here because once you’re out of the city, options get thin fast.
We found Checkers the cheapest, and the one at Hidas Centre has an Asian supermarket upstairs that makes its own tofu and tempeh. We got weirdly excited about that because we knew we wouldn’t be finding much of it elsewhere!
If you’ve got the energy, wander past Christuskirche or the Independence Memorial Museum, or grab a sunset drink somewhere like the Balcony of Love. But if all you do is eat and sleep, that’s fair too, that’s basically what we did on day 1.
Where To Stay
Campsite – Urban Camp
This spot was great. They’ve got both regular campsites and glamping tents if you don’t have your camper yet.
The facilities were amazing, they had a swimming pool, a bar that even served vegan food (a major selling point for us), and the bathrooms were honestly some of the nicest we had the whole trip.
Accommodation – Chic City Flat
We stayed here right at the end of our trip, but it’s also great for the beginning too! It’s a one bedroom apartment with a washing machine, a balcony, and access to a pool.

Day 2: Quivertree Forest
🚗 Drive Time: ~5 hrs
🛣️ Road Type: All tarmac
🎯 Must-Do: Walk among the quivertrees at golden hour
💡 Tip: Grab a barista coffee when you leave Windhoek, they’re rare after this
This is your first proper drive day. And I won’t lie, I was nervous.
But it’s actually a really easy one, so it’s great to ease into self-driving. The road’s all tarmac, it’s wide and quiet, and within the first hour of leaving Windhoek, we’d already seen a giraffe, baboons and a load of ostriches just along the side of the road.
If you care about coffee, stop at Olivia’s Kitchen before you leave. After Windhoek, finding a decent coffee with plant milk is weirdly difficult until you reach Swakopmund.
We did stop in Kalkrand and honestly… I wouldn’t again. I was desperate for a wee, and paid to use the petrol station bathroom, and when I came out, James and the car were completely surrounded by a huge group of people asking for money. I was shitting myself for a second. I don’t think anyone meant harm, but it was overwhelming.
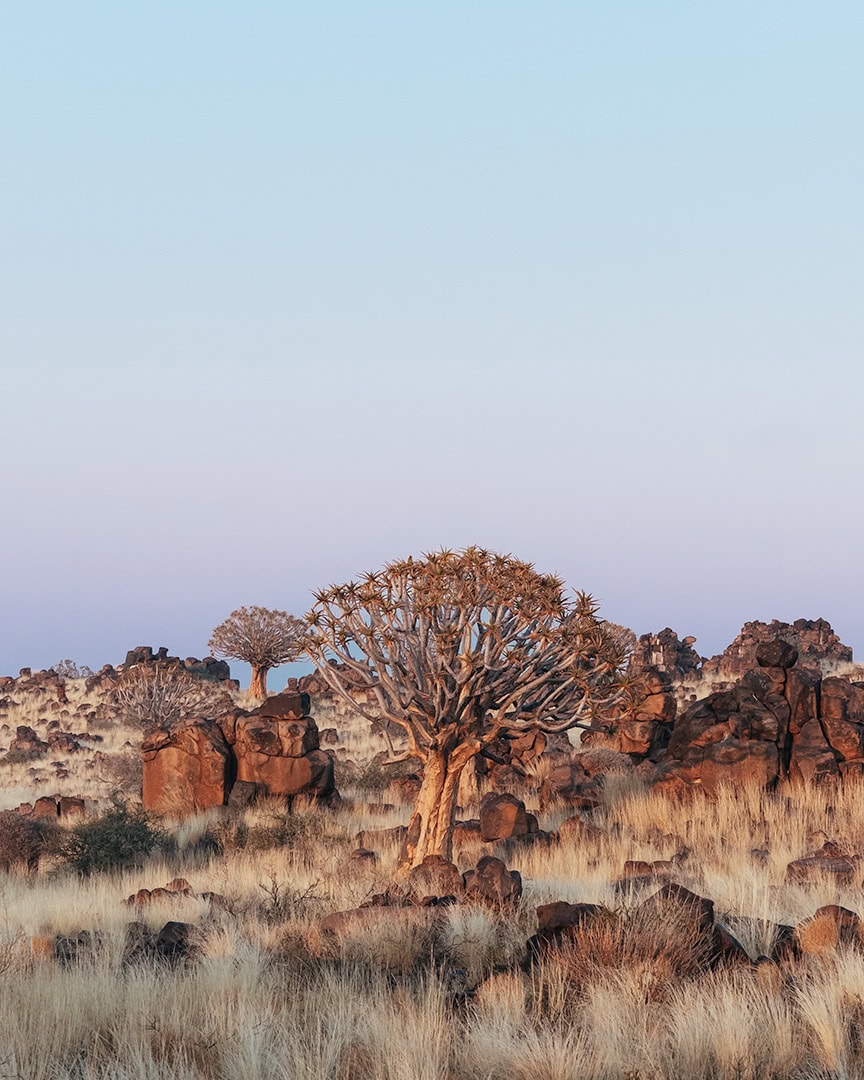
We arrived at Quivertree Forest in the late afternoon and were welcomed by the lovely Julius and his two dogs, Luna and Olka. The forest is also a private park, but your camping fee includes entry, so you can wander through the quirky trees and rock formations as much as you like. Golden hour here is unreal.
It was our first night in the camper, and this was the perfect place to get used to it. It was quiet, peaceful, and we felt totally safe.
Where To Stay
Campsite – Garas Park Rest Camp
This is where we stayed, and it felt like such an underrated gem. You’re surrounded by quivertrees, and the two lovely dogs on site made us feel right at home.
The facilities are basic, just a small toilet block and a shower, but it was clean, peaceful, and had everything we needed for the night.
Accommodation – Stellies Accommodation
If you’re not camping, this guesthouse in nearby Keetmanshoop is a great option after a long drive. It’s a bit further from the Quivertree Forest, but comfy, clean, and a good place to rest your head before heading further south.
Day 3: Fish River Canyon
🚗 Drive Time: ~2 hrs
🛣️ Road Type: Tarmac & Gravel
🎯 Must-Do: Sunset at the canyon rim
💡 Tip: Top up fuel and supplies in Keetmanshoop
If you stayed at Quivertree Forest, I really recommend waking up early, unzipping your tent flap, and watching the sunrise through the trees while still snuggled in your sleeping bag.
We made breakfast at camp and had a wander through the forest before heading off, and Luna joined us. She’s honestly the sweetest pup. I really wanted to take her with us.
Stop in Keetmanshoop to fill up on fuel and grab supplies. There’s a big supermarket, and petrol stations are pretty scarce until after Fish River Canyon, so don’t skip this.
The drive to the canyon is about 2 hours from Quivertree, and this is where you hit your first proper stretch of gravel road. When we visited, it was in decent condition, but it can change fast depending on the weather.
We spotted oryx and springbok along the way, and the scenery starts shifting into open plains with hazy mountains in the distance.
Try to reach Fish River Canyon by early afternoon so you’ve got time to explore and find a good spot for sunset. It’s thought to be the second biggest canyon in the world (and the biggest in Africa), it’s pretty impressive!
The entrance fee is 150 NAD pp/pd (approx. £6.84).
We stayed for 2 nights, but looking back, 1 would’ve been enough. As long as you catch sunset (and maybe sunrise the next morning), you’ll have seen the best of it.
Just make sure you’re back at camp or your accommodation before dark, rental companies won’t cover you for driving at night, the roads aren’t lit, and it’s not worth the risk.

Where To Stay
Campsite – Hobas Campsite (NWR)
This is where we camped, and I liked how rustic it is. There’s a small shop, bar, restaurant, and even a pool.
The only downside was the bathroom situation. If someone left the lights on, you’d usually find a few creepy crawlies. That said, it’s right by the canyon entrance, so perfect for an early start.
Accommodation – Canyon Village (Gondwana Collection)
Hotel options are limited around here, but this one’s just 13 minutes from the canyon and gets great reviews.
We didn’t stay here, but it looks beautiful, with cosy cottages, dramatic rock backdrops, and a pool to cool off in.
Day 4–5: Lüderitz
🚗 Drive Time: ~4.5 hrs
🛣️ Road Type: Gravel + tarmac
🎯 Must-Do: Kolmanskop ghost town, Shark Island and explore town
💡 Tip: Stop in Aus to break up the journey
Day 4: Drive To Lüderitz & lighter exploring
Whether you take it slow in the morning or catch Fish River Canyon at sunrise, make sure you actually eat properly first, you’ve got about 4.5 hours of driving to get to Lüderitz. You’ll backtrack along the gravel to the highway, and you’ll cross the Fish River again from a totally different angle.
We broke the drive up in Aus (around 3 hours in) and grabbed a coffee and fries at the Bahnhof Hotel. There weren’t really any other vegan options when we were there, but it did the job.
Aus is also known for its wild horses, so keep your eyes peeled. We didn’t see a single one (rude), but we did spot loads of ostrich, oryx, and springbok. We also passed a few hyena signs too… but no actual hyenas.
And then, right before Lüderitz, the road suddenly cuts through these rolling sand dunes that come out of nowhere. It’s genuinely stunning.
Lüderitz had way more going on than I expected. We only stayed 1 night and immediately wished we’d booked 2, so this itinerary actually gives you that extra time to do it properly.
That evening, we walked around Shark Island. It’s beautiful, but it holds really heavy history, it was the site of one of the first concentration camps during the genocide of the Ovaherero and Nama peoples under German colonial rule. It’s a lot to sit with, but it’s also very important.
Day 5: Kolmanskop & More Exploring
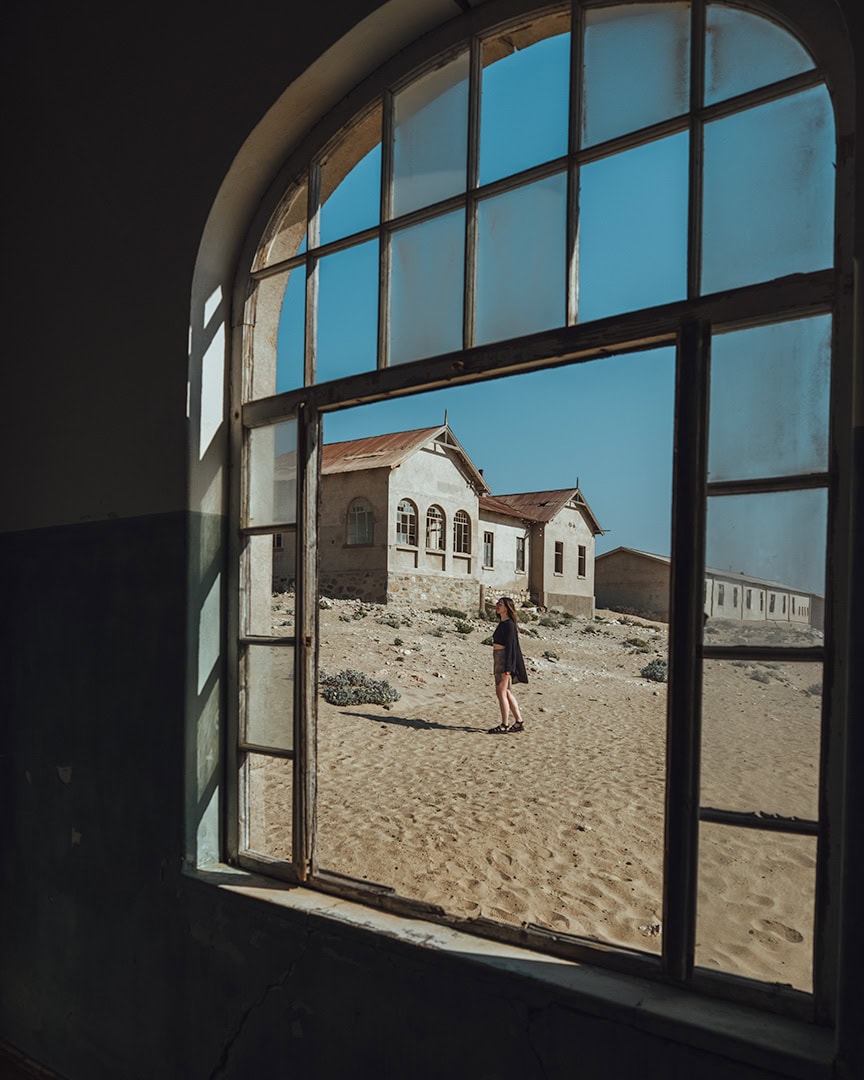
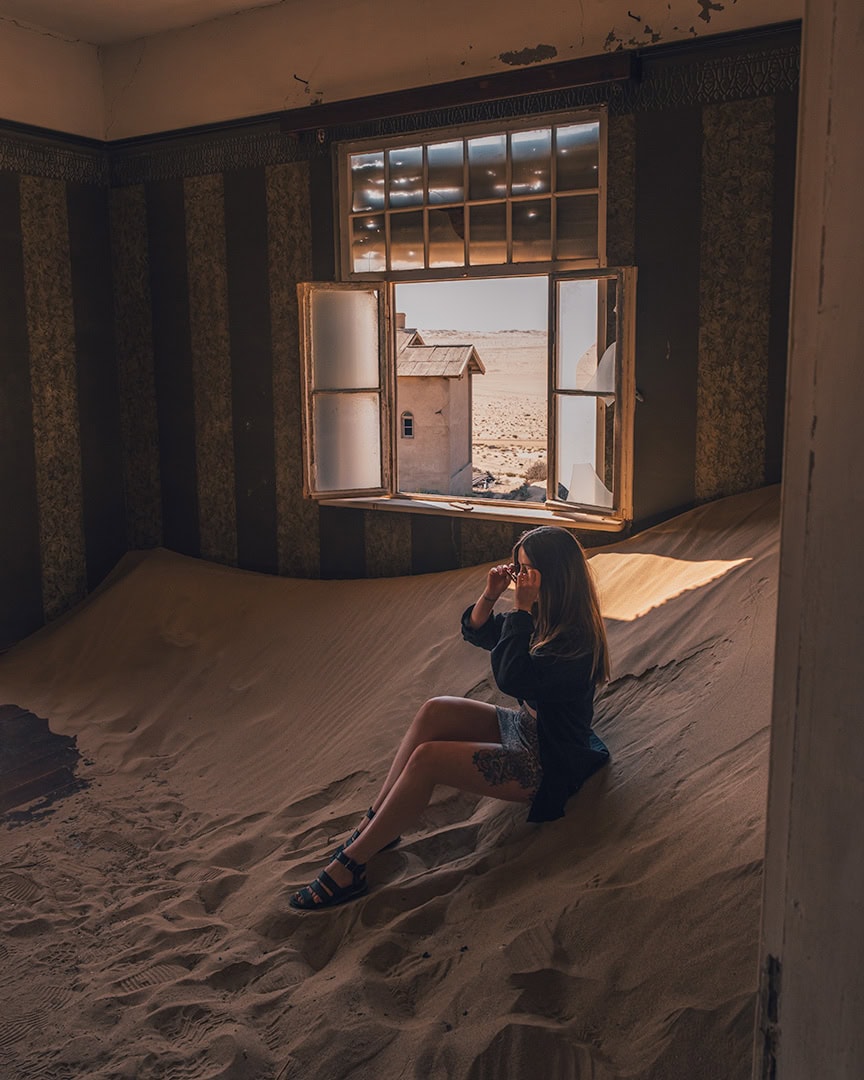
The next morning, head to Kolmanskop, the abandoned diamond mining town that’s been slowly swallowed by the desert. The buildings are collapsing, the sand is pouring in through the windows, and it honestly feels like you’re walking through a ghost town.
Entry was 180 NAD per person (about £8.20) and it was 100% worth it.
If you’ve got extra time (or you’re glad you gave Lüderitz 2 days), here are a few good add-ons:
- Boat trip to Halifax Island to see the jackass penguins (yes, that is genuinely what they’re called)
- Wander around Lüderitz’s colourful colonial buildings
- Go flamingo spotting near Diaz Point or Agate Beach
- Visit Shark Island if you didn’t get there yesterday
Where To Stay
Campsite – Limited Choices
There is a campsite on Shark Island, but honestly, I didn’t feel comfortable staying there. With the site’s tragic history, it just didn’t sit right with me.
There’s another option out at Diaz Point, but the reviews aren’t great, apparently the facilities are pretty rough. Might be okay if you’re not too fussed, but I’d personally give it a miss.
Accommodation – 2FiftySix on Second
This is where we stayed, and I honestly can’t say enough good things. Our host, Phylicia and her family were some of the kindest, most welcoming people we met on the whole trip.
The little unit had everything we needed, a comfy bed, a kitchen, a bathroom, secure parking, and the holy grail… laundry (for a small extra cost!).
Day 6–8: Sossusvlei & Deadvlei
🚗 Drive Time: ~8 hrs (yes, you read that right!)
🛣️ Road Type: Mostly gravel
🎯 Must-Do: Deadvlei and/or Big Daddy at sunrise, Dune 45 at sunset
💡 Tip: Stay inside the gate for early and late access
Day 6: The Brutal Drive Day
I’m not going to sugarcoat it, this was easily the roughest drive day of the whole trip. You just can’t avoid it, unfortunately. It’s around 8 hours, and it’s a whole lot of gravel road rattling away at your soul.
We ignored Google’s suggested route and took the D707 instead because we’d heard it was in better condition. Zero regrets. The scenery is ridiculous, dunes on one side, mountains on the other.
You’ll also pass through NamibRand Nature Reserve, and even just driving through felt like a mini safari. We saw jackals, giraffes, tons of oryx, and more springbok than I could count. There were elephant signs too (which got us wildly excited for about 10 minutes), but sadly, no actual elephants appeared.
When you finally roll into Sesriem, this is where a bit of planning makes your life so much easier. Staying inside the park costs more, but if sunrise/sunset is a priority, it’s genuinely worth it.
You’ll also pay park fees (about 150 NAD / ~£6.84 per person per day), and the big perk is access: you can enter an hour before sunrise and stay an hour after sunset.
It was also the only situation our rental company allowed driving in the dark, which meant we could actually catch golden hour properly.
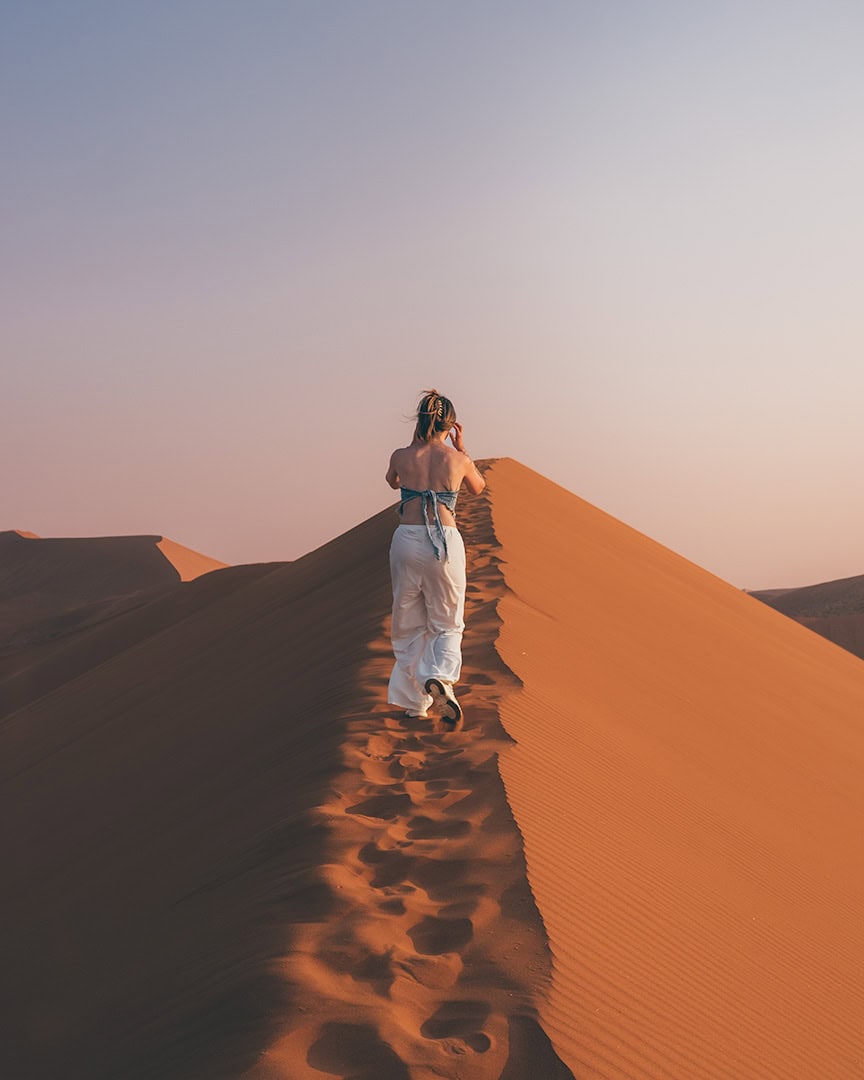
Day 7: Sesriem Canyon & Dune 45 at sunset
After yesterday’s drive, you’ve earned a slow morning. Have a proper brekkie, regroup, and then head to Sesriem Canyon before the midday heat kicks in.
It’s a short, easy wander through a surprisingly dramatic little gorge, about 1 km long and around 30 metres deep, carved out by the Tsauchab River over a very long time.
We didn’t do this ourselves, but if you’re feeling fancy (or just want to see the desert from a different angle), you could also book a hot air balloon ride. We met the loveliest couple on our safari in Onguma who did it, and their photos gave me huge FOMO.
For sunset, Dune 45 is stunning! It’s one of the most accessible dunes in the park, it’s basically a giant ridge of apricot coloured sand that glows in the evening light.
Most people do it at sunrise, but we went for sunset instead, and it was gorgeous… and way less chaotic.
Day 8: Deadvlei, Big Daddy & Elim Dune
This is your big sunrise day: Deadvlei (and Big Daddy only if you’re doing it first).
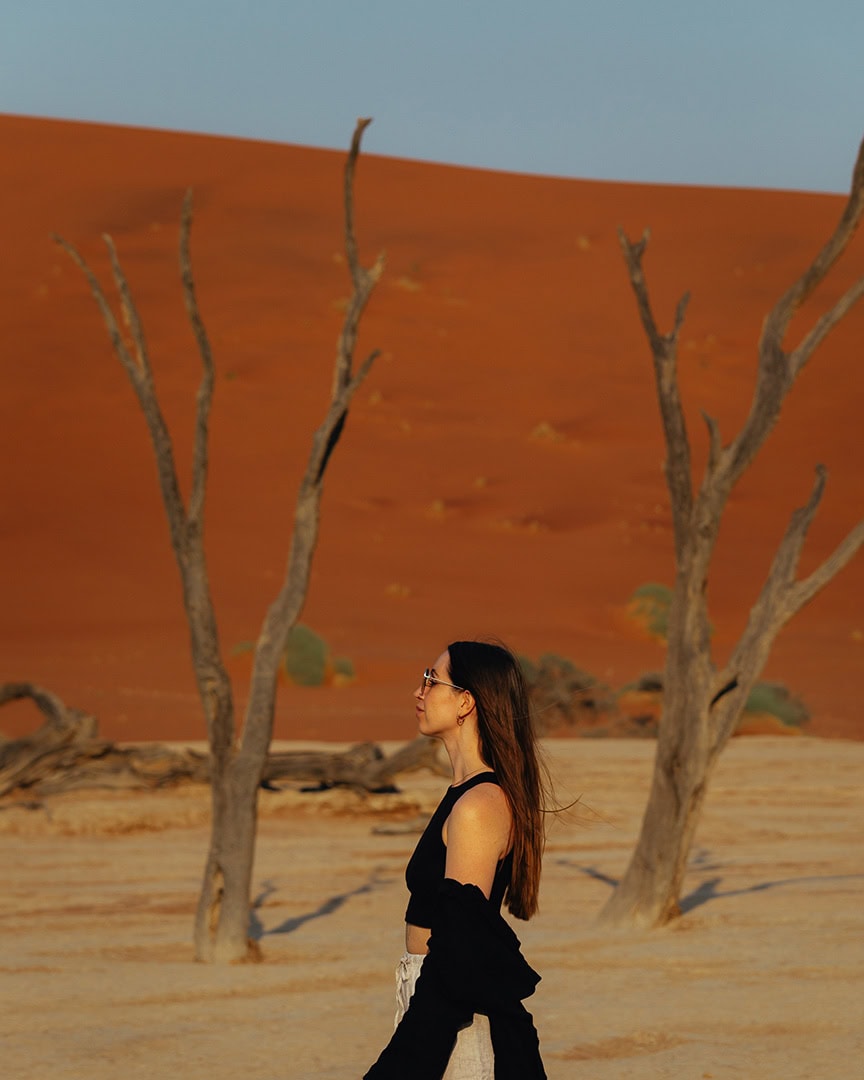
We did Deadvlei at sunrise, and I was genuinely buzzing, I’d wanted to see the petrified trees for years, and somehow it still managed to exceed the hype. Photos don’t even come close. (If you’re still debating whether Namibia is worth it, this is the moment that settles it.)
We then made the classic mistake of attempting Big Daddy straight after… and I do not recommend. It was already pushing 30°C, the wind was feral, and halfway up we were getting sandblasted hard!
If you actually want to get to the top, do Big Daddy first while it’s still cool, then drop down into Deadvlei afterwards.
Once you’ve done the sunrise chaos, keep the rest of the day deliberately chilled. Pool time, nap, slow lunch, whatever brings you back to life.
Then late afternoon, head to Elim Dune (about 10 minutes from Sesriem). We brought drinks, sat there for sunset, and it was so peaceful.
Important tip: the sand track to Deadvlei/Big Daddy
Getting to Deadvlei and Big Daddy is its own little adventure because of the deep sand track. It’s 4×4 only, and once you’re on it, there’s no going back. We did a test run the night before, and I’m glad we did.
It was so bumpy, but we had to keep going, otherwise we would be stuck! At one point, pots and pans were trying to launch themselves out of the back while we sweated through the chaos.
Before you go in, swing by the Sesriem petrol station and drop your tyre pressure, they’ll help you sort it, and they can pump you back up afterwards.
And if you’re reading this thinking ‘“sod that”, there’s a shuttle from the car park (about 260 NAD / ~£11.90 per person), and it’s honestly the stress-free option.
Where To Stay
Campsite – Sesriem Campsite NWR or Oshana Camp (both inside the gate)
We stayed at Sesriem NWR and were pleasantly surprised. Spacious pitches, each with shade and a fire circle.
Facilities were decent, basic, but clean enough, and there’s a (freezing) pool, bar, and restaurant if you need a break from camp cooking.
Oshana Camp is just behind and looks a bit more modern, with private ablution blocks and kitchenettes. Next time, we’d probably stay there, but you still get access to the main NWR facilities either way.
Accommodation – Desert Quiver Camp (outside the gate) or Sesriem NWR (inside the gate)
If you’re not camping, the key choice is inside or outside the park gates. Outside = better value. Inside = early sunrise and sunset access, totally worth it if you want the dunes at golden hour.
Desert Quiver Camp (outside) has stylish private units with outdoor kitchens, desert views, and a pool/bar.
Sesriem NWR rooms (inside) are the most affordable way to stay within the gate. They’re not fancy, but location is everything here.
Day 9–11: Swakopmund & The Skeleton Coast
🚗 Drive Time: ~6 hrs
🛣️ Road Type: Gravel with twisty canyon roads
🎯 Must-Do: Sandwich Harbour tour, Skeleton Coast, flamingos in Walvis Bay
💡 Tip: Bring something to cover your face at Cape Cross Seal Reserve, the smell is intense
Day 9: Drive To Swakopmund
Sorry, it’s another shitty long drive day. Maps says 4.5 hours, but with the gravel and those winding canyon roads, it took us closer to 6!
Do yourself a favour and break it up in Solitaire. It’s a cute stop with roaming mongooses and, somehow, vegan food (I nearly cried). I had the lentil curry, and James had a burger; both were genuinely good, which feels like a small miracle in the middle of nowhere.
Getting into Swakopmund felt like such a gear change, it’s almost funny. Suddenly, there are proper roads, cafés, and this full-on German seaside vibe. We went straight to Slow Town Coffee, and it was a dream… actual barista coffee with plant milk, our first proper one since Windhoek.
You’ve got plenty of vegan-friendly options too! Garnish (an Indian veggie spot) had huge portions and really good prices.

Day 10: Drive the Skeleton Coast
Driving the Skeleton Coast feels properly post-apocalyptic with eerie fog rolling in, the desert slamming straight into the sea, and random shipwrecks (and the odd whale bone) dotted along the coast.
If you can, make time for Cape Cross Seal Reserve. I have never seen that many seals in one place in my life!. One warning though: the smell is violent. I still gag thinking about it. Bring a scarf or a mask, and you’ll be absolutely fine (and very glad you did).
We also met a couple who decided to kayak to see the seals, which in hindsight would’ve been such a cool way to do it… and, importantly, probably way less smelly.
Day 11: Sandwich Harbour Tour + Walvis Bay Flamingos
Sandwich Harbour was a massive highlight. It’s the spot where the dunes literally slide straight into the Atlantic. You can only access this by tour as you’d probably get stuck otherwise.
The drive itself is basically a dune rollercoaster (so much fun!), and we even spotted a whale, genuinely worth 👏 every 👏 penny 👏.
Most Sandwich Harbour tours also bundle in a few extras so you can see the flamingos at Walvis Bay and a quick stop at the pink salt lakes.
And if you’ve still got energy left, you can visit Dune 7, it’s the tallest dune in Namibia, and it’s not far from town, so it’s an easy extra if you’re not quite ready to call it a day.

Where To Stay
Campsite – Tiger Reef
This was our base, and we really liked it. It’s right next to the ocean, so you’ll fall asleep to the sound of waves.
It’s a simple setup, but the toilets and showers were lovely (rare for camping!). There’s even a beach bar a minute away for sunset drinks.
Accommodation – The Nautical Nook
If you want a proper bed for a few nights, this apartment’s in a great central spot.
It has free parking and a kitchen, great if you want to cook for yourself.
Day 12–13: Spitzkoppe
🚗 Drive Time: <2 hrs
🛣️ Road Type: Mostly tarmac
🎯 Must-Do: Rock arch sunset, stargazing, Bushman’s Paradise
💡 Tip: Campsites are first come, first served. Put your table and chairs out to reserve your spot
Day 12: Rock Art & Sunset At The Arch
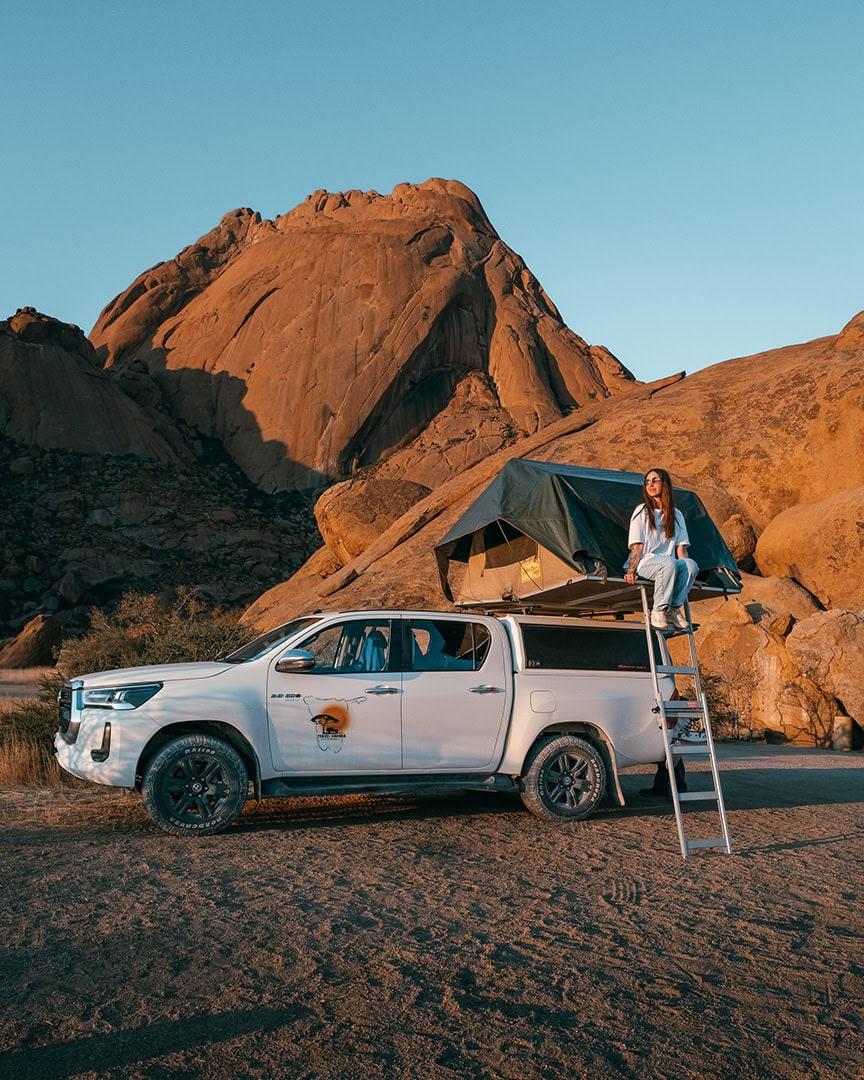
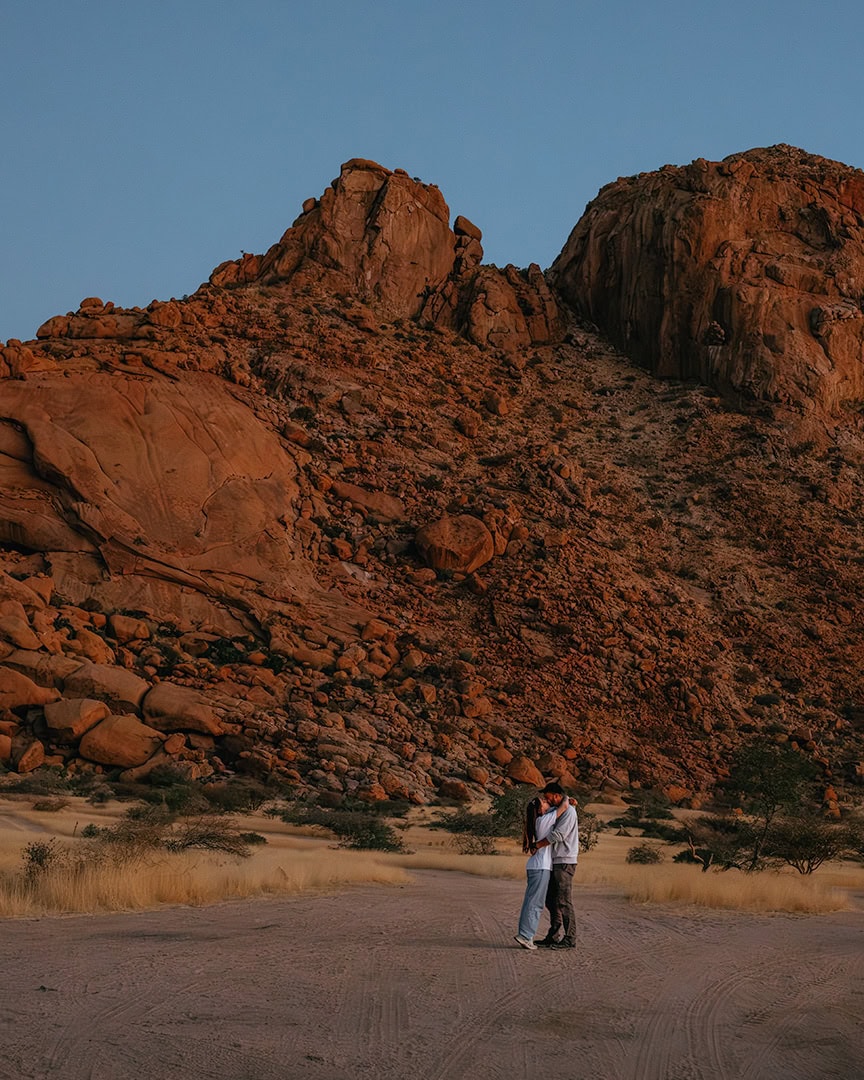
Finally, a short drive day! It’s under 2 hours from Swakopmund and mostly tarmac (thankfully), a very welcome break after all the gravel chaos. You’ll start spotting Spitzkoppe from way out too, with these massive boulders just rising out of the desert.
I didn’t really know what to expect, but I ended up loving it. After so many long drive days, this was the breather I didn’t realise I needed.
Once you’re set up, head to Bushman’s Paradise and/or Little Bushman’s Paradise to see the rock art. You’ll need a guide (they’re usually hanging around by the car park) and you’ll need to give them a tip.
Bushman’s Paradise is the more “effort” option with a short but steep walk up (there’s a metal handrail, which helps). Little Bushman’s is basically right by the car park if you want the low-effort win.
For sunset, make your way to the rock arch, which has beautiful views over Spitzkoppe. There’s also a rock pool nearby, although it was pretty dry when we visited, so it was more like a puddle!
Day 13: Hike & Slow Desert Evening
Today is your choose your own adventure day. Pick one of the longer hikes, depending on how you’re feeling and book on to these at reception by the main gate:
- Gross Spitzkoppe Hike (4–5 hrs)
- Pontok Route (3–5 hrs)
- Matterhorn Route (6–8 hrs)
If you’re not a hiker (or just not in the mood), that’s totally valid. We actually loved just driving around, pulling over for photos whenever we felt like it, and then heading back to camp to do the important stuff: chilling between the rocks with a couple of beers/ciders.
Spitzkoppe is made for slow evenings. The campsites are basic but stunning, spread out between the boulders so it feels like you’ve got the desert to yourself. We lit fires both nights, ate dinner in our camping chairs, and watched the sky light up.
And the stars are unreal. With basically zero light pollution, we could see the Milky Way with the naked eye by about 8 pm. We were buzzing.
Where To Stay
Campsite – Spitzkoppe Rest Camp
This is where we stayed, and I’d 100% recommend it. Each site has a dry toilet and fire pit, and there are hot showers and flush toilets near reception, though that can be a 10–15 min drive depending on your spot.
Sites are first come, first served. If you don’t love your spot on night one, you can move to the next. A table or chairs left out usually means it’s taken.
My favourite spots were around sites 9–11. We stayed at 11B on our first night, then moved to Summit, where we were joined by some very cute dik-diks.
Accommodation – Spitzkoppe Cabin Camp
If you’re not camping, this is a great option. The cabins are tucked between the rock formations in a really scenic spot.
Each one has a little outdoor area, and there’s a shared bathroom block nearby.
Day 14: Damaraland
🚗 Drive Time: ~3–4 hrs
🛣️ Road Type: Gravel
🎯 Must-Do: Desert elephant safari
💡 Tip: Do the elephant tour tomorrow morning, don’t rush today
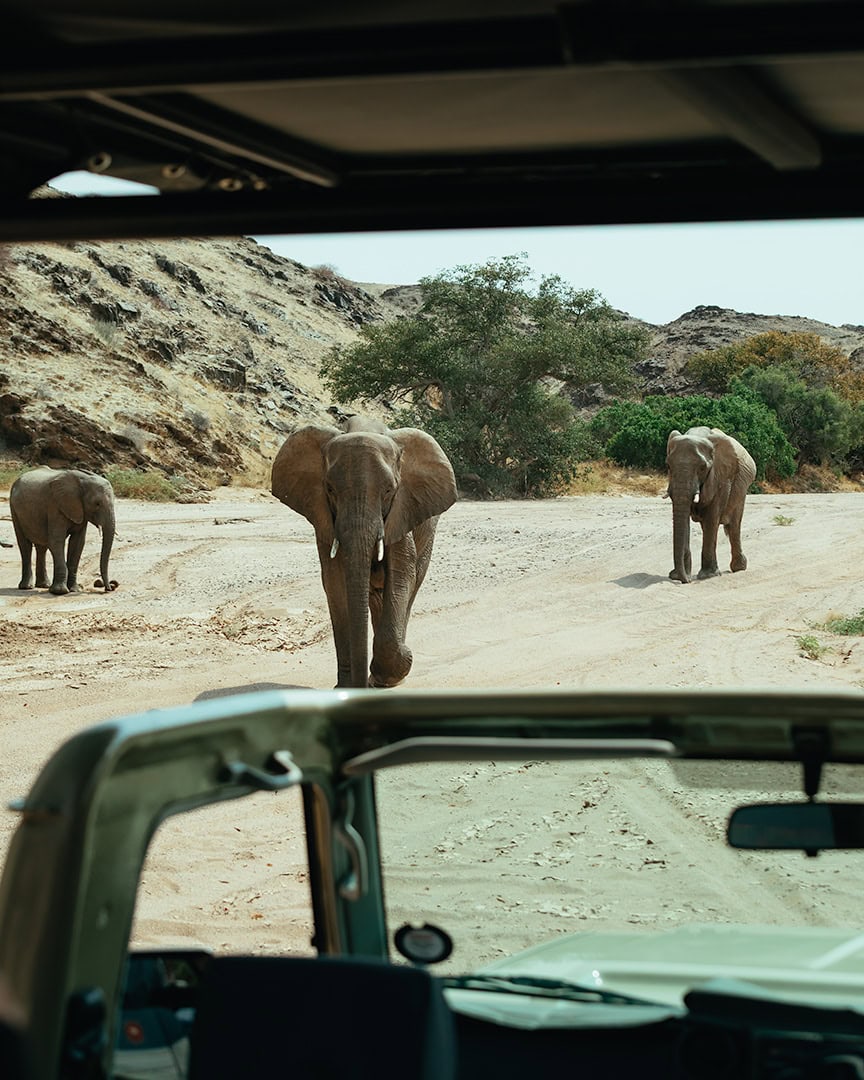
After a couple of slower days in Spitzkoppe, it’s time to head into Damaraland, home to Namibia’s rare desert elephants. They roam along the Ugab riverbed, and seeing them was such a special part of our trip.
Damaraland is vast, so I’d recommend staying near Twyfelfontein, where most elephant tours start. The drive from Spitzkoppe takes around 3–4 hours, depending on your route and where you’re staying.
Book your elephant tour for the next morning instead of trying to cram it in today, as you’ll be tired, and rushing would take the joy out of it.
We went with Twyfelfontein Elephant Safaris as the tour at our campsite was more than double the price. It turned out to be the best decision though. Our guide, Rosie, was so warm, funny, and so passionate about the wildlife. She kept pulling out her bird book and excitedly pointing things out. I adored her.
She found the elephants quickly, and I actually cried when we first saw them. Even James welled up. We’d just turned a corner, and there they were. A family of five: Daisy (about 65) and her youngest, around 7, surrounded by giraffes and springbok.
Rosie explained how they dig into the dry riverbed to reach water and how deeply emotional they are, especially their family bonds and when grieving.
The tour cost 1,000 NAD pp (around £45.50), and I’d pay it again in a heartbeat. Just wrap up warm, it’s freezing in the mornings, especially in an open vehicle.
Where To Stay
Campsite – Twyfelfontein Elephant Drives Campsite
We didn’t stay here (we booked a glamping tent at Madisa Camp, it’s a nice site, but the private tents weren’t worth the price). If you’re doing the safari with Twyfelfontein Elephant Safaris, this campsite makes total sense.
It’s fairly new with clean toilet/shower blocks, a braai area, fire pit, and a pool. If the tour pickup area is anything to go by, everything’s really well kept.
Accommodation – Aabadi Mountain Camp
Local lodges can be pricey, but Aabadi is one of the more affordable options with solid reviews.
We didn’t stay here ourselves, but the tents looked great, definitely better value than what we paid. It’s about a 40 minute drive from Twyfelfontein, so still a good base for the safari.
Day 15: Outjo
🚗 Drive Time: ~3 hrs
🛣️ Road Type: Gravel & Tarmac
🎯 Must-Do: Restock before Etosha
💡 Tip: Use this as a practical overnight stop
After your elephant tour (and you’ve stopped crying over how cute they are… or was that just me?), it’s time to head to Outjo.
Maps say 2.5 hours, but with gravel roads, budget closer to 3, maybe more!
We chose to overnight here so we could stock up and be fresh for Etosha the next day. Once you’re inside the park, food and fuel options are limited and pricey, so this is your chance to grab snacks, basics, and top up on fuel.
There’s also a cute little bakery in town where we grabbed a coffee, and they had plant milk(!), which felt like a rare find.
Honestly, treat today as a reset. Between your morning safari, the drive, and errands, you won’t have much energy left. Get your bits sorted, chill, and rest up for tomorrow.

Where To Stay
Campsite – Ijaba Lodge
We didn’t camp here ourselves, but reviews suggest it’s a great option in Outjo.
There are shared facilities, power points, and a grassy area, perfect for a quick overnight stop.
Accommodation – Sasa Safari Lodge
This is where we stayed, and it was such good value. The owner and staff were lovely, and you can either join their home cooked meals or self cater in the shared kitchen.
There are a couple of walking trails nearby, plus a pool for a post drive cool off.
Day 16–18: Etosha National Park
🚗 Drive Time: ~As long as you want to explore
🛣️ Road Type: Mostly gravel within the park
🎯 Must-Do: Visit the waterholes to see more wildlife
💡 Tip: Bring binoculars!
From Outjo, I’d split Etosha like this:
- Day 16 – Okaukuejo side
- Day 17 – Cross the park to Namutoni
- Day 18 – Namutoni & Onguma Reserve (Onguma is just outside the Von Lindequist Gate)
Etosha is huge, so this route helps you cover a lot without feeling like you’re just driving in circles.
At the gate, your car will be checked, as no plastic bags or drones are allowed. (They also don’t allow meat out of the park, but that obviously wasn’t an issue for us.)
Entry is 150 NAD pp/pd (about £6.84) and covers 24 hours from the time you enter.

Day 16: Okaukuejo & the Western Side
The drive from Outjo to Etosha isn’t bad at all. You’ll enter via the Anderson Gate and head straight up to Okaukuejo.
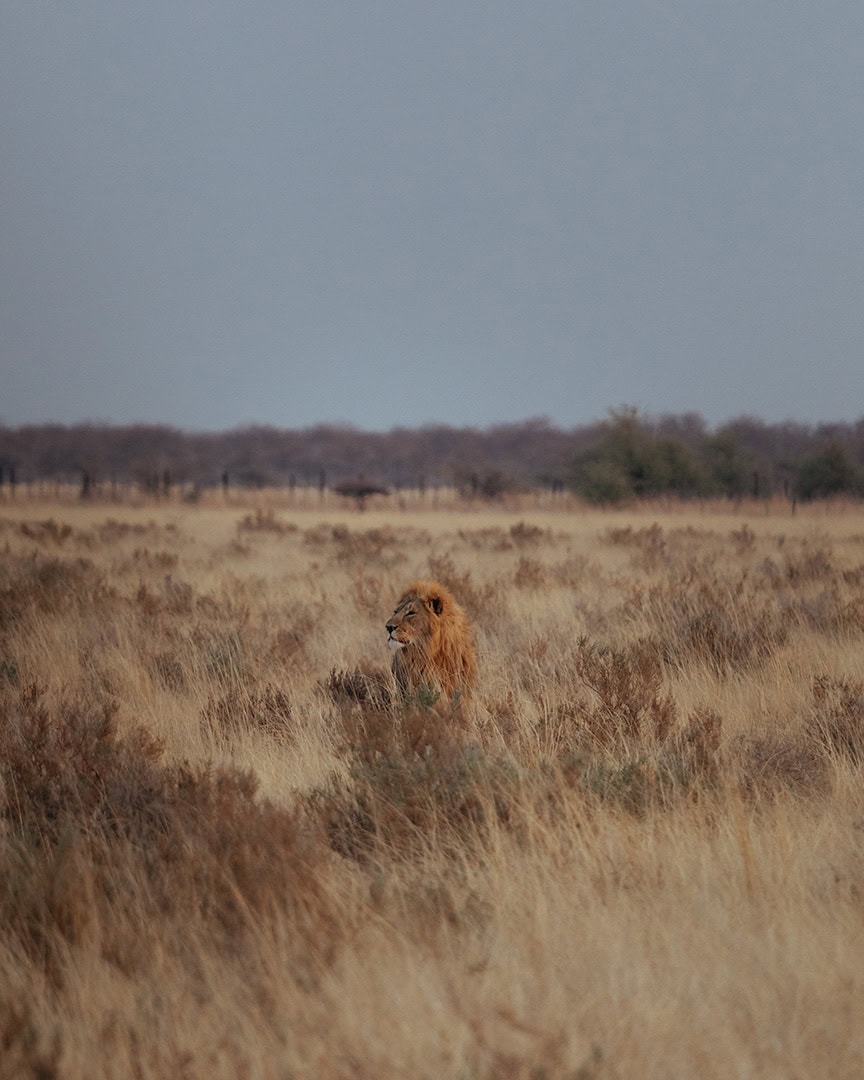
We got insanely lucky at Okondeka waterhole. It was just us and one other car when the guy next to us started getting animated and grabbed his binoculars. At first, we couldn’t see a thing, but when I zoomed in on my phone, there they were. Two lions rising from the grass and strolling toward us. It was unreal!
Bring binoculars if you can. We didn’t, and would’ve missed them entirely if not for that guy.
Closer to the Okaukuejo camp, we also spotted a black rhino. Of course, wildlife can show up anywhere, but this side of the park definitely delivered.
Where To Stay
You’ve got two main options: stay inside the park at Okaukuejo NWR (they’ve got campsites and rooms), or just outside at Etosha Village Campsite (camping only).
Okaukuejo is a bit more basic, but it’s got a waterhole where you can spot wildlife without even leaving camp. Etosha Village has much better facilities, but no waterhole, so it depends on what you’re after.
Day 17: Cross the Park to Namutoni
Today’s all about slowly making your way across Etosha towards Namutoni. It’s not a quick drive by any means, especially with all the stops you’ll want to make.
There are loads of waterholes along the route, and we saw so much wildlife. Elephants, giraffe, zebra and springbok, all along the side of the road (and sometimes in the road too!).
We also spotted a white rhino snoozing about 30 metres away, thanks to a tour group that had already pulled over.
Try to take the little detour to Halali and the Moringa waterhole. Like everything in Etosha, sightings are never guaranteed, but it seems to be one of the more reliable spots
There are also a couple of gated picnic spots along this road, which is a nice break from the car (they’re gated for obvious reasons, no one wants to become a lion’s lunch).
Once you get to Namutoni, there’s a swimming pool, bar, and a waterhole at the campsite. We could hear elephants all evening from our tent which was pretty wild!
Where To Stay
You can stay either inside or outside the gate, but we stayed at the Namutoni NWR site (they’ve got both camping and rooms), and I honestly didn’t mind it.
The facilities were decent overall, the bathrooms were a bit run down, but nothing tragic. The best part was the waterhole though… every time we walked over, there were elephants hanging around. Worth it for that alone!

Day 18: Namutoni & Onguma Reserve
Start your morning exploring the eastern side of Etosha around Namutoni. We literally drove out of the camp gates and were met by a herd of around 40 elephants, no word of a lie, it was amazing!
There are loads of great waterholes nearby. Tsumcor was absolutely buzzing with wildlife, and at Chudop, we watched a smaller group of elephants splashing around. One was so happy, he kept plopping and rolling in the water, it was ridiculously cute.
We also did the Fisher’s Pan loop, hoping to spot wild cats. We had no luck, but it’s worth a try!
Once your time in Etosha is up, exit via the Von Lindequist Gate and head to Onguma Nature Reserve, which is just next door. It’s a private reserve with its own wildlife, so the fun’s not over yet.
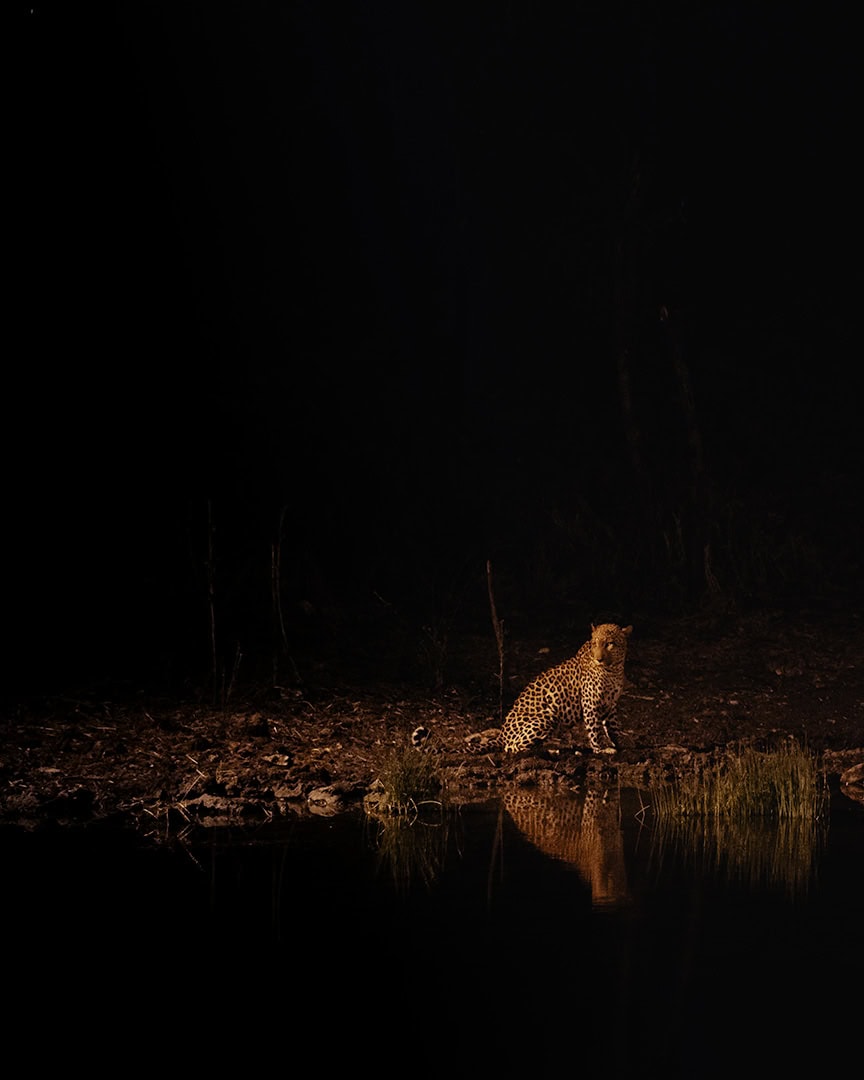
Stay here if you can. The bar and restaurant overlook a waterhole, and while we were finishing dinner, a leopard strolled out of the bushes! He stalked a lone flamingo, but the flamingo waded into deeper water (he was so not fussed!) and the leopard gave up. It was our first ever leopard sighting, so we were grinning from ear to ear!
Onguma also offers guided game drives, and we did a morning one on day 19 (1,920 NAD / approx. £87.68 pp). It was absolutely worth it!
We saw three lions (a boy and girl trying to ditch a third male), giraffes, zebras, two rhino brothers having a spat, and two cheetah brothers lounging with full bellies after a big meal!
Where To Stay
Campsite – Onguma Tamboti Campsite
There’s only one option I’d recommend here, and that’s Tamboti. It was my favourite campsite of the whole trip! It’s a bit pricier than most, but totally worth it. Each spot comes with its own private toilet and shower block, and there’s a swimming pool, bar, and a waterhole right on site.
If you feel like a splurge, Onguma also has accommodation options, including luxury lodges overlooking the reserve, so you can enjoy those epic views with a glass of wine in hand.

Day 19–20: Waterberg Plateau
🚗 Drive Time: ~4.5 hrs
🛣️ Road Type: Mostly tarmac
🎯 Must-Do: Plateau hike (with a guide), rhino tracking
💡 Tip: Book 2 nights, we only did 1 and really regretted it
Day 19: Drive To Waterberg Plateau
The drive to Waterberg is a really nice one, smooth and scenic, and once you arrive, the landscape shift is dramatic. The orange sandstone plateau rises out of thick greenery, and the whole place feels lush and alive. Totally different from the dry desert elsewhere in Namibia.
Make this a proper “do as little as possible” afternoon. The lodge views are ridiculous (in the best way), and it’s the perfect place to decompress. We only booked 1 night and immediately regretted not staying longer.
If you do want to move a bit without committing to anything intense, there are a few short self-guided nature trails that are ideal for a low-effort wander. They give you a map when you check in.
And if you’re camping… be careful with your food. We had a honey badger show up and absolutely go to town on the bins (and our neighbours’ bags, which they’d left out… for some unknown reason).
They’re famously fearless and can get aggressive, so don’t go anywhere near one if it appears, and definitely don’t leave anything edible outside.
Day 20: Guided Plateau Hike + Rhino Time
One of the best things to do here is the plateau hike, but you do need a guide.
We sadly didn’t have time, and I was gutted. Not only are the views from the top meant to be unreal, but the guide also shares stories about the local people and life in the area.
Waterberg is also one of the best areas in Namibia for rhino spotting. They’re heavily protected here, and you can join a guided drive or do rhino tracking on foot with a ranger, which I bet is as cool as it sounds!
Where To Stay
Camping & Accommodation – Waterberg Wilderness | ONE Namibia
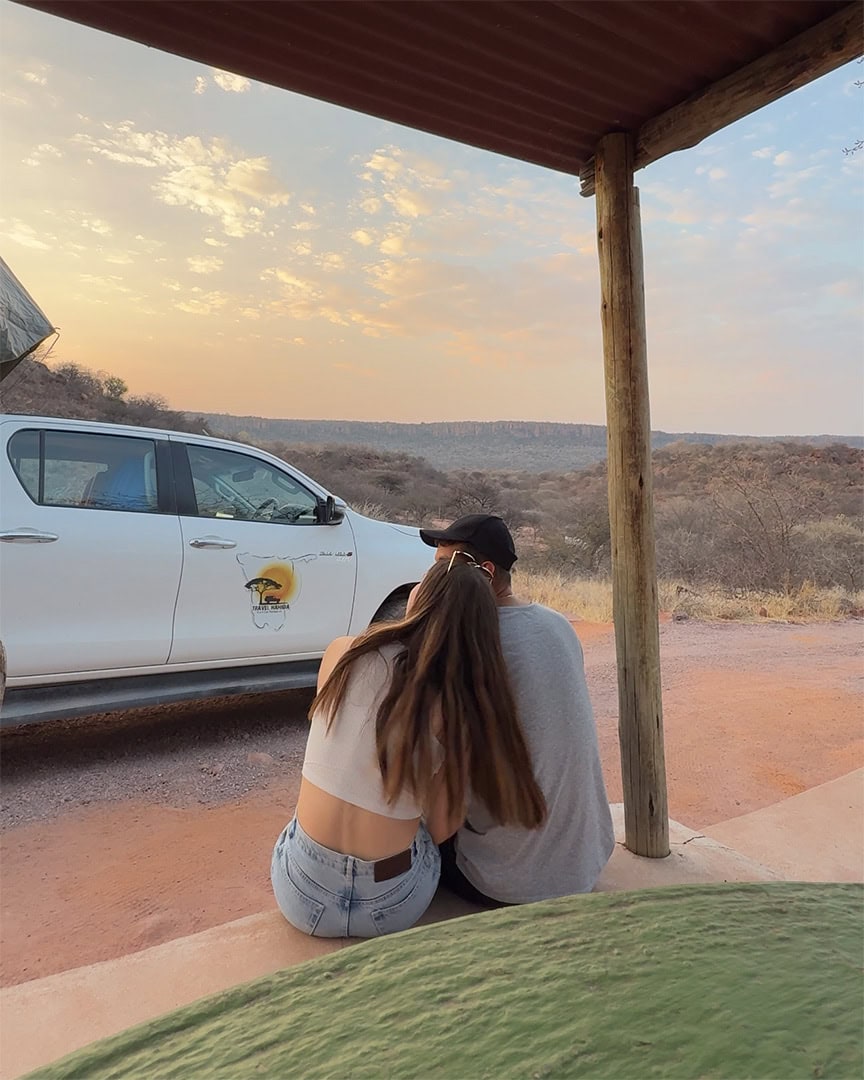
The views here are amazing! We camped, but they also have rooms if you’re after a bit more comfort. It’s super peaceful, and the campsites are well spaced out with amazing scenery all around.
There are also a few lodges on site where you can grab food and drinks, and even a couple of swimming pools.
Day 21: Windhoek
🚗 Drive Time: ~3.5 hrs
🛣️ Road Type: Mostly tarmac
🎯 Must-Do: Return your camper, decompress, explore anything you missed
💡 Tip: Fill up the gas tank before returning the vehicle
This is the final stretch! Today you’ll drive back to Windhoek to return your camper and wrap up your epic Namibia road trip.
If your flight is today, most rental companies offer a shuttle to the airport, but double check when booking. If not, and you’re staying an extra night or two like we did, now’s your chance to explore anything you missed in Windhoek.
We spent our last two days doing laundry, catching up on sleep, and easing back into normal life (with a side of good food and decent coffee!).
Once you’ve dropped the camper off, there are ride sharing apps available in Windhoek, and it’s much cheaper than taxis, so perfect for getting around without a car.

Where To Stay
Campsite – Urban Camp
Same as Day 1. Great location, excellent facilities, and ideal if you’ve handed back your camper but still want to use their glamping tents.
Accommodation – Chic City Flat
We stayed here at the end of our trip. Super comfy, central, and a great place to decompress before heading home.
Where I’d Add If I Had More Time
If you’ve got more than 3 weeks in Namibia, I’d definitely consider adding the Caprivi Strip, Kavango Region, or even heading northwest towards Opuwo.
We really wanted to include the Caprivi Strip, but just couldn’t make it work with all the other places we wanted to see. The drive is long, and fitting it in meant cutting too many other places.
If you’re keen to go, I’d suggest skipping Quivertree Forest, Fish River Canyon, and Lüderitz to make room. The Caprivi has a totally different vibe from the rest of Namibia, it’s lush, green, river-lined, and absolutely packed with wildlife.
It’s also a great jumping off point for Botswana! When we picked up our camper from Travel Namibia 4×4 Rentals, they even asked if we were planning to cross the border, so it must be done often enough for them to ask.
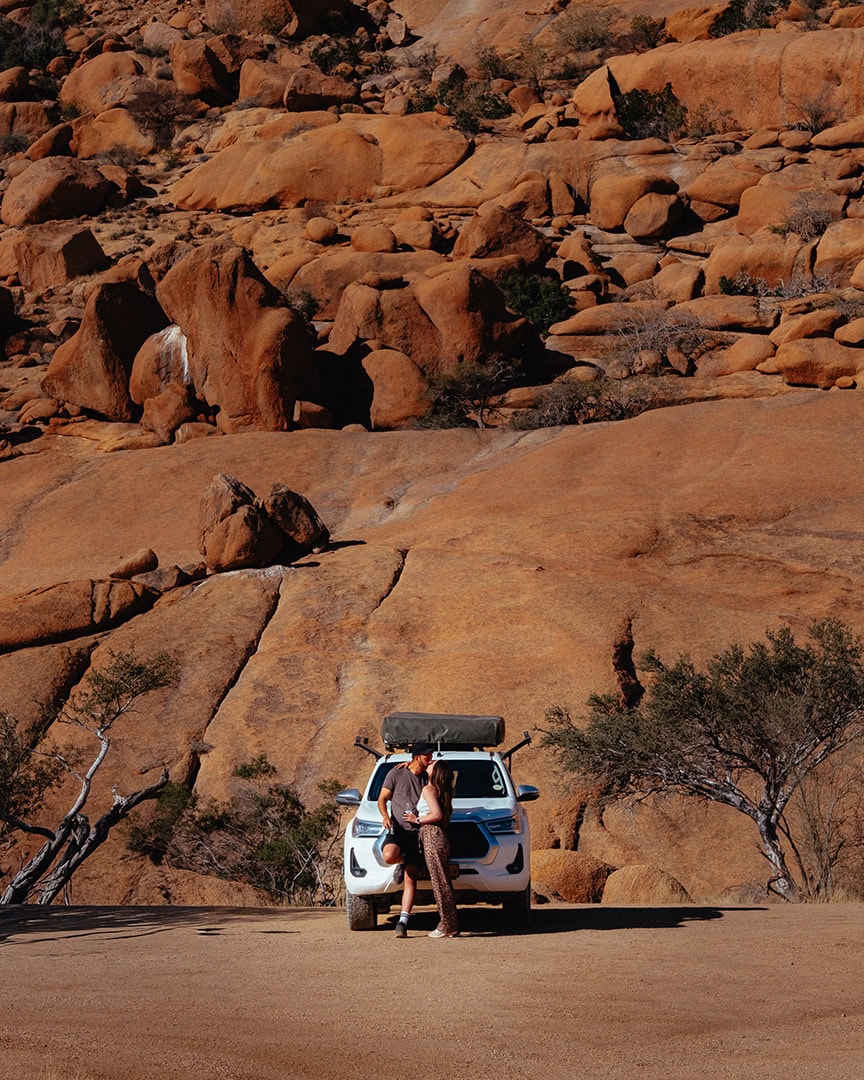
Booking Your 4×4 or Car in Namibia
This trip genuinely lives or dies by your vehicle choice. Namibia is basically gravel-road central, the distances are big, and places like Sossusvlei and Etosha are just easier with a 4×4.
Not that you can’t do it in a normal car, you absolutely can, but you won’t be able to drive the deep sand section in Sossusvlei, and the long gravel stretches will feel even bumpier (and louder) without the extra clearance.
We rented a fully-kitted 4×4 camper from Travel Namibia 4×4, and they were honestly brilliant. I’d recommend them in a heartbeat.
One thing though: book early. We booked six months ahead and still couldn’t get a manual. And before you pay a deposit, do a quick boring-but-important check of what’s actually included: tyre cover, recovery gear, whether you get a second spare, and what your insurance excess looks like if something goes wrong.
Future you will be very grateful you looked before you needed it.
Tips for a First Time Self Drive Trip in Namibia
Drive times are deceiving
Maps might say 2 hours, but gravel roads will say otherwise. Everything takes longer than you think, so fill up on fuel when you can (even if you’re only half empty).
Gravel roads are the norm
Most roads are unpaved, and some are rough. Keep your speed down, avoid braking hard on bends, and make sure you know how to change a tyre.
Avoid driving in the dark
Most rental companies don’t allow it, and it’s not worth the risk with wildlife on the roads. Plan to reach your next stop before sunset.
Time your trip wisely
The rainy season can mean trickier roads and fewer wildlife sightings. If you’re still figuring out when to go, the best time to visit Namibia depends a lot on what you want to see.
Don’t count on signal
Reception is patchy at best in remote areas. Download offline maps and save any booking details before you get on the road.
Stock up when you can
Windhoek, Swakopmund, and Outjo have proper supermarkets. After that, choice gets pretty limited, and prices go up fast, especially inside national parks.
Namibia can cost a lot
Between 4×4 rental, fuel, park fees, and camping, your Namibia road trip costs can add up fast. Stock up on food to cook for yourself and book your vehicle and campsites far in advance to keep costs down.

What to Pack for a Namibia Road Trip
Packing for Namibia is all about being practical. You’ll have hot, dusty days, freezing desert nights (I slept in my coat a few times!), and long distances without shops, so a bit of planning goes a long way.
The absolute essentials I wouldn’t skip:
- Binoculars – we nearly missed lions in Etosha without them.
- Head lamp – campsite lighting is not a given. James literally had to hold my phone torch while I used the loo because I didn’t pack one.
- Windproof & waterproof jacket – even in the dry season, the wind can be brutal.
- Warm layers for night time – desert evenings get seriously cold, I was really surprised!
- Insect repellent – especially in certain regions.
- Sun cream – the sun is intense and you’ll be outside a lot.
If you’re currently packing for Namibia, keep it simple and bring plenty of layers!

Where to Go if You Only Have 10 Days in Namibia
This was easily one of the funnest (and, let’s be real, most expensive) road trips I’ve ever done. I knew Namibia would be incredible, but I still wasn’t prepared for how much it would blow me away. Photos and videos will never do it real justice!
That said, 3 weeks isn’t always realistic. Time off work, budget, life, it all adds up. And Namibia can cost a lot once you factor in the 4×4 rental, fuel, park fees and campsites. I’m not saying it’s not worth it, it absolutely is, but…life.
If you’ve only got 10 days, I’d focus on the main spots, Sossusvlei, Swakopmund and the Skeleton Coast, and Etosha National Park. It’s a well trodden route for a reason. You’ll get the burnt orange dunes, the wild Atlantic coastline, and a proper safari experience without stretching yourself too thin.
You won’t see everything (Namibia is huge), but you’ll still get a proper taste of what makes this country so special.