What It’s Really Like to Drive Yourself Through Etosha (And Why It’s So Different From a Guided Safari)


If Etosha is on your Namibia itinerary, you’ve probably already clocked that most people do it as a self-drive, and then immediately started wondering if that’s actually something you can pull off without a guide.
We had the exact same thought. It was our first self-drive safari, and wondered how on earth are we going to drive through this humongous park and actually be able to see anything?
Then we spent 3 days driving through the park ourselves, and came away having seen lions, elephants, giraffes, and more, all at our own pace, with no one else’s schedule to worry about.
Honestly? It’s so much easier than it looks. The roads are well-maintained, the signage is clear, and within a couple of hours, you’ll actually wonder what you were being so dramatic about (or was that just me?).
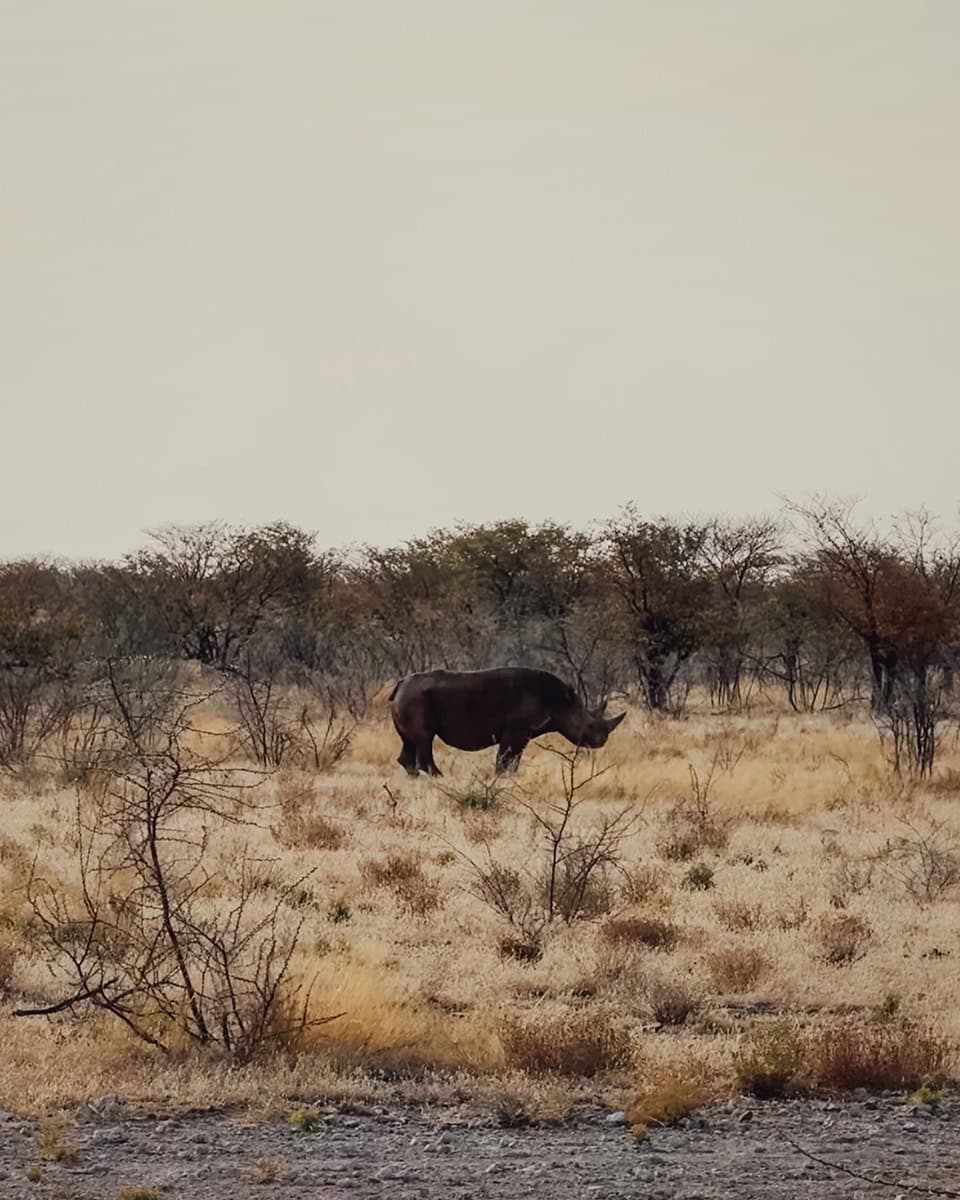
A few early starts, some time at the waterholes, and a bit of patience goes a long way. And if loads of cars have stopped in one place, do not pass go! There’s almost always a reason (this is how we saw rhinos!).
I’ll cover everything you need to know, routes, camps, timings, and the bits that make it feel a lot less daunting before you go.
Is Etosha Easy to Self-Drive?
Honestly? Yes. If you’re going to do your first self-drive safari anywhere, Etosha is a brilliant place to start.
I’m not exactly the world’s most confident driver, James did most of the driving while I was busy trying to film everything on two cameras and a phone (one camera clearly isn’t enough), but I did a few stints too, and it was absolutely fine.
The roads are easy to follow, waterholes are clearly signposted, and you’re not going to accidentally veer off into the wilderness. That’s coming from someone who is unbelievably directionally challenged.

You also don’t need a 4×4 for Etosha. If the rest of your Namibia trip doesn’t need one, a 2WD could save you a decent chunk of money, handy, seeing as driving in Namibia is already going to empty your bank balance. The main park roads are mostly gravel and were in good condition when we visited; only a couple of side roads felt a little more rugged.
The one thing to stay switched on for: the wildlife (obviously). Animals have absolutely zero road etiquette (and honestly, why should they?), and we had a few herds suddenly charge out in front of us like the hounds of hell were after them.
The speed limit is 60km/h, but there were plenty of times we were going well under that. Go slow, stay alert, and never assume the road ahead is going to stay empty for long.
Best Time to Visit Etosha for Safari
If seeing loads of wildlife is the goal (which I’m guessing it is), the dry season is your best bet. May to October is when animals spend way more time at the waterholes, which makes them so much easier to spot.
We went in September, and the sightings were honestly ridiculous. I don’t think we pulled up to a single waterhole that was completely dead.
The wet season (November to April) can still be beautiful, but unless you’re really into birding, wildlife spotting gets trickier. With more water around the park, animals don’t need to stick to the waterholes, so they spread out a lot more.

The transition months are actually pretty underrated though. April especially is on my list for a return trip because the baby animals are still tiny (I would literally cry), there’s still some green in the landscape, and the waterholes start getting busy again as the rains ease off.
Timing your days well matters too. The park opens at sunrise and closes at sunset, and those golden hours are when everything feels most alive. Midday can go a bit flat once the heat kicks in, and even the animals seem to collectively decide “fuck that” and disappear for a while.
If you’re staying inside the park, the camp waterholes are an awesome bonus. They can get really active after dark, so even once the gates close, you’ve still got a front-row seat.
Getting to Etosha National Park
Etosha is actually a really easy stop to add into a Namibia road trip because it connects well with a lot of the main towns and cities.
Most Namibia routes end up looping around the country in some way, so Etosha can slot in pretty naturally either near the beginning of your trip or towards the end, depending on which direction you’re going.
Driving Times From the Main Hubs
Drive times to Etosha depend a lot on which gate you’re heading for, and trust me, this matters more than you’d think.
The park has four gates, and they sit on completely different sides, so getting this wrong can add hours onto your day (ask me how I know).
- Anderson Gate in the south is the most popular entry point and usually the easiest to work into a standard Namibia route, sitting close to Okaukuejo.
- Von Lindequist Gate in the east is the one to use if you’re coming from that direction or from Onguma Nature Reserve.
- Galton Gate in the south-west is much quieter and worth considering if you want something a bit more off the beaten path.
- King Nehale Lya Mpingana Gate is up in the north, which is less commonly used and sits about 50km from the main road to Ondangwa.
The gate you use will depend on where you’re coming from and where you’re staying inside the park.
We actually did this completely backwards. We entered through Von Lindequist Gate despite coming from Outjo, which is only about 1.5 hours from Anderson Gate.
It added around 2 extra hours onto our drive for absolutely no reason. So before you set off, double check which gate actually makes sense for your route. Don’t be us.

Windhoek
The two easiest gates from Windhoek are Anderson and Von Lindequist. Anderson is the quicker of the two at around 4 hours, while Von Lindequist is closer to 5. Most people coming from Windhoek head for Anderson first.
Swakopmund
From Swakopmund, both Anderson Gate and Galton Gate are reasonable options at around 5.5 hours. Anderson tends to be the more popular choice since it puts you closest to Okaukuejo campsite.
Sossuvlei
I personally wouldn’t recommend driving straight from Sossusvlei to Etosha in one go. It’s technically doable, but it will be a shit drive day, and you’ll skip some really good stops along the way.
We did it more gradually, going via Swakopmund, Spitzkoppe, and Damaraland before heading over to Etosha, but I understand not everyone has the time for all of that.
If you are set on doing it in one go, you’re looking at around 8 hours of driving without stops, and that’s not factoring in gravel roads or road conditions, which can slow you down quite a bit.
So yes, you can do it… but I wouldn’t.

Etosha Entry Info
Honestly, this is one area we didn’t research as well as we should have before arriving. We picked up most of the rules when we collected the camper, but luckily nothing caught us out!
Entrance Fees
You’ll need to pay a daily entrance fee covering a 24-hour period. As of April 2026, that’s 280 NAD per person per day (roughly £12.50), and if you know how many days you’re spending in the park, you just pay for all of them upfront.
No need to book in advance either. You pay at the gate, where staff will take your passport details and car registration, and off you go.
Opening Times
Gate times change throughout the year because they open at sunrise and close at sunset. When we arrived there was a clock at the entrance showing the exact times for that week, which made it easy.
Even if you’re staying inside the park, you need to be back at your campsite before the gates close at sunset. So if you’re driving into Etosha that day, give yourself more time than you think you need.
We nearly missed getting into our campsite in Sossusvlei because the drive took longer than expected, and that kind of stress is really not what you want after a long day.
Rules Worth Knowing Before You Arrive
They check your vehicle both going in and coming out, so it’s worth knowing what to expect. Here are the ones that catch people out:
Stay In Your Vehicle At All Times
Once you’re through the gate, you stay in the car unless you’re at your campsite or a designated stop area.
There are a few gated picnic and toilet spots dotted around, but they’re fairly spread out, so go for a wee before you leave camp.
No Drones Are Allowed
This is one of the main things they look for at the gate. Drone rules in Namibia are fairly strict anyway, but even if you have a permit to fly elsewhere, it won’t cover you inside the park.
Leave it outside Etosha.
No Plastic Bags
Obviously, this makes a huge amount of sense. Plastic has a horrible habit of ending up absolutely everywhere, including the most far-flung or pristine places.
It’s not just ugly, it can also be dangerous for the animals. So if you’ve got any plastic bags in the car when you get to the gate, you’ll need to bin them before you go in.
You Can’t Take Meat Out Of The Park
You can bring it in, you just need to make sure it’s eaten before you leave.
This was obviously not an issue for us as vegans, although the staff did find it pretty hilarious when they opened our fridge and found about a week’s worth of tofu.
How Many Days Do You Need in Etosha?
We spent 3 days in Etosha, and it felt like the sweet spot. It gave us enough time to see both sides of the park, drive across without feeling rushed, and actually sit at the waterholes properly rather than just pulling up for 2 minutes and moving on.
If you’re short on time, 2 days can still work, but you’ll need to be more intentional. Either pick one side and explore it properly, or cross the park knowing you won’t be able to stop as much as you’d like. Once you’re watching the clock to make it back before sunset, it starts to feel more stressful than fun.
Some people recommend 4 to 5 days, and if you’ve got the time, go for it. But 3 days were perfect for us.
If you have more time and want to see somewhere a little different, Onguma Nature Reserve, just outside Von Lindequist Gate, is a brilliant add-on and well worth considering (saw a leopard here, which was amazing!).

Where to Stay in Etosha
You’ve basically got two options: inside the park or outside the gates. We did a mix of both, but if I’m being honest, I preferred staying inside, and it’s mostly down to the camp waterholes.
Staying Inside the Park
The best thing about staying inside Etosha is that once you’ve parked up for the night, you can still wander over to the waterhole and see what shows up.
And when the gates open in the morning, you’re already in. It’s only a small head start, but when early mornings are prime time for sightings, it does make a difference.
The trade-off is that the facilities are a bit old and tired. The bathrooms gave old-school changing room vibes… and not in a cute, nostalgic way.
They had everything we needed, but if you’re expecting anything polished, just manage your expectations. They’re also pricier than staying outside the gates, but you’re paying for the convenience and the waterhole access.
All the camps inside the park are bookable through the NWR website, and I’ve linked each one below so you can go straight to it.
If you’re travelling in peak season, don’t leave it too late. We booked around 4 months in advance to be on the safe side.
Namutoni Camp
Namutoni sits on the eastern side near Von Lindequist Gate, close to Onguma if you’re adding that on.
This is where we stayed. It has a pool, bar, restaurant, shop, waterhole, and both camping and rooms. A little run down, but it worked really well as a base.
Okaukuejo Camp
Okaukuejo is on the south-west side near Anderson Gate, making it one of the handiest options if you’re coming from Windhoek.
It has a great reputation for rhino sightings at the waterhole, and this is the side of the park where we spotted both white and black rhinos. Facilities could do with some love, but the location is really convenient.
Halali Camp
Halali sits right in the middle of the park between Namutoni and Okaukuejo, making it a good shout if you want a central base or to break up the drive across.
Camping and rooms, plus a waterhole. Same general vibe as the others: practical, a little dated, does the job.
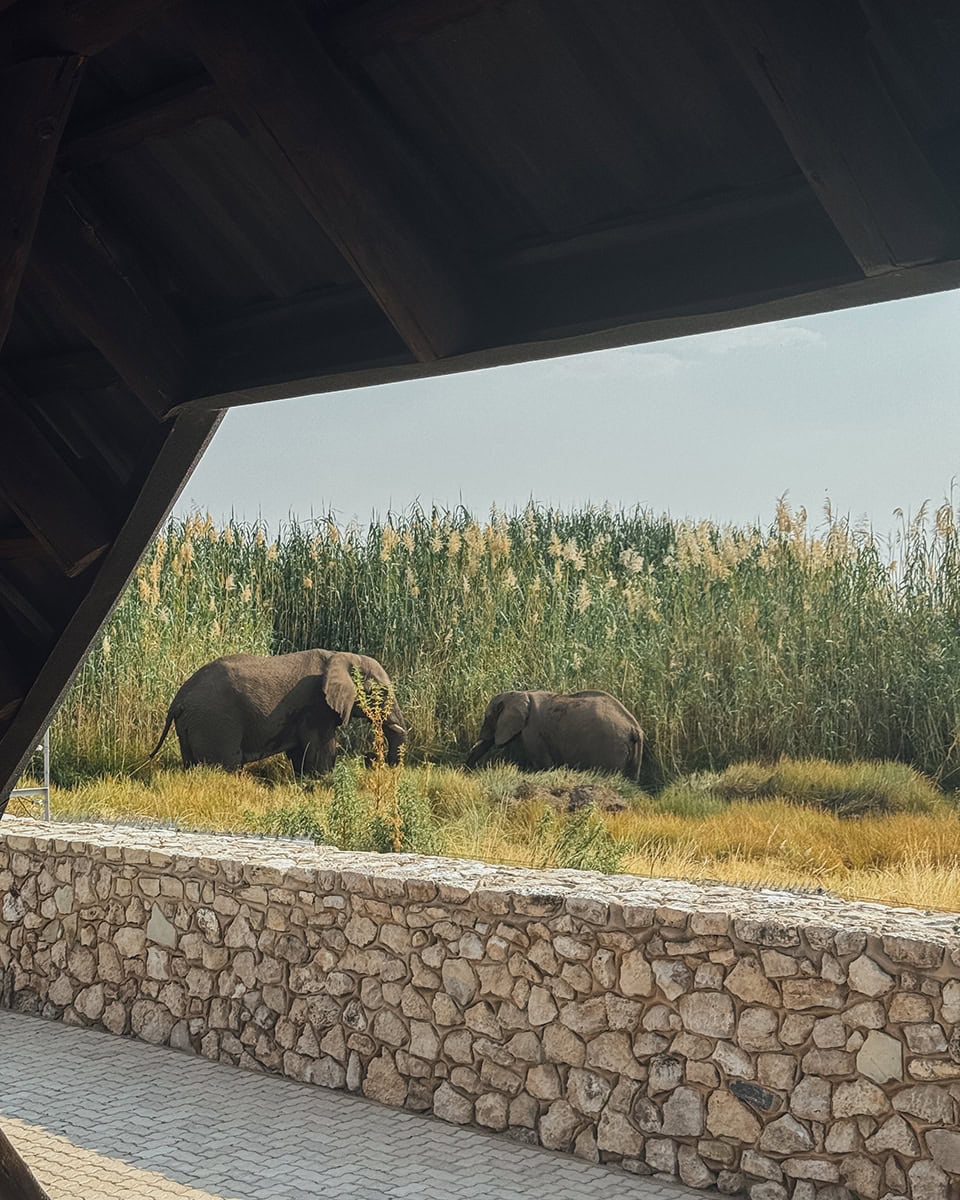
Dolomite Camp
Dolomite is on the quieter western side near Galton Gate. It’s worth noting that this one is luxury tents only, no camping, so only good if you want to book a room for the night.
It has a waterhole and an infinity pool, but reviews are mixed, with quite a few people mentioning the camp isn’t gated, which made some guests uneasy.
Olifantsrus Camp
This is Etosha’s newest campsite, and it’s also on the western side near Galton Gate. It’s camping only (so not the right choice for you if you don’t have a camper), with a waterhole and a hide, and apparently a brilliant area for black rhino sightings.
Reviews do flag that there’s no running water between 7pm and 7am, so worth knowing going in.
Onkoshi
Onkoshi is up in the north-east, with stilted tents overlooking the salt pan. No camping, no waterhole, but there is a pool.
It’s a beautiful looking spot, but probably not the best choice if you want access to a waterhole or to use your camper if you have one.
Staying Outside the Gates
If comfort is higher on your priority list than convenience, staying outside the park is genuinely worth considering. You tend to get a lot more for your money too, which is always a win when Namibia is already doing its best to empty your bank account.
The only real downside is having to go through the gates each time you enter, and your car gets checked every single time. It’s not a big deal, but queues do happen, so the earlier you get there, the better.
Most places outside the gates are easy enough to book through Booking.com, which is what we did.
We stayed outside for 2 of our nights, and if I’m being honest, the places outside Etosha were nicer overall. What you’re giving up is that sunrise head start, and the camp waterholes, but some places outside have their own waterholes anyway, so it’s not always as much of a sacrifice as it sounds.
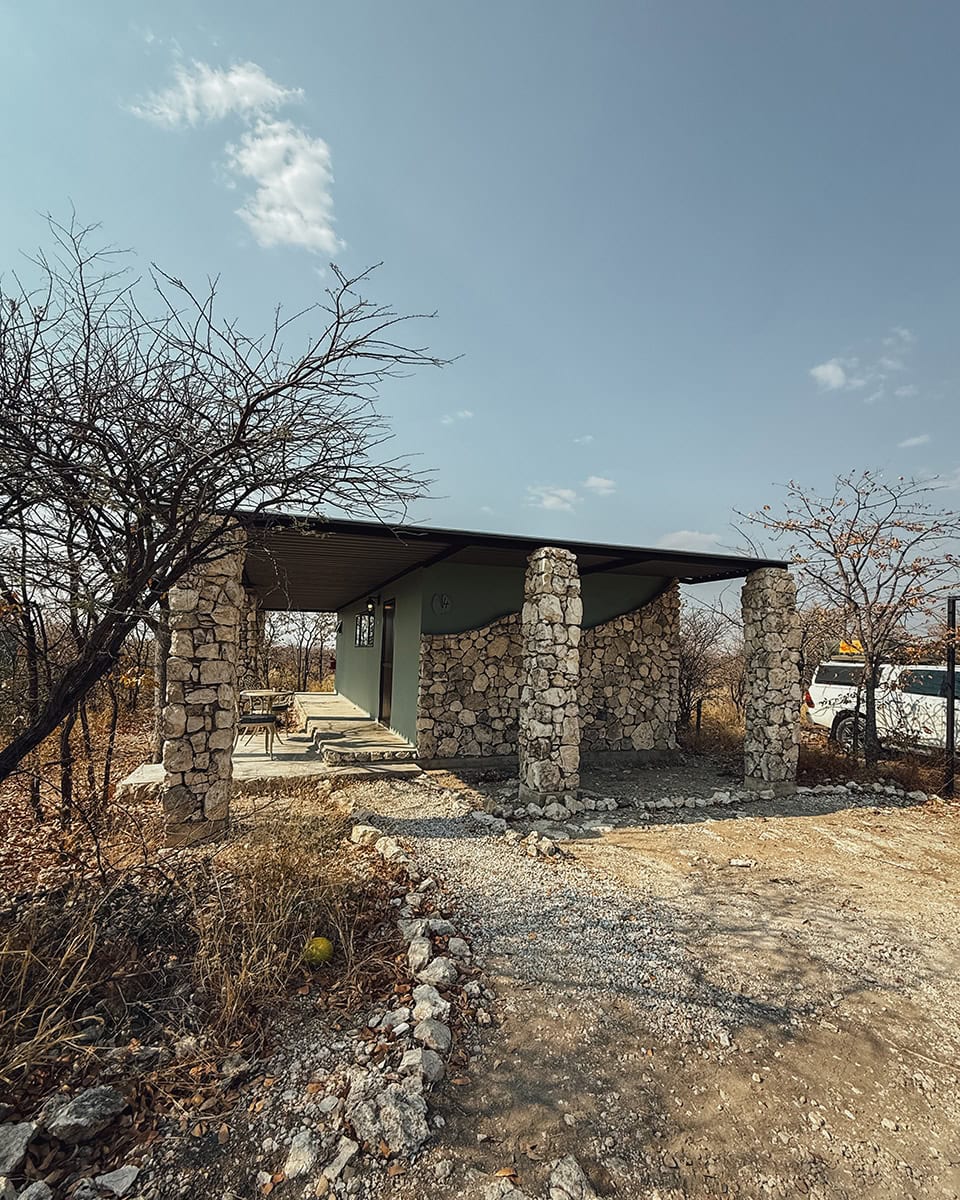
Onguma Tamboti Campsite
Onguma Tamboti Campsite is just outside Von Lindequist Gate and part of Onguma Nature Reserve. This was my absolute favourite campsite of the entire trip, and I will not be taking questions on that.
There’s a waterhole by the restaurant, you can do guided game drives in Onguma itself, and we watched a leopard make a very lazy effort at getting a flamingo while we were eating dinner. I still think about this evening.
The campsite also had its own private bathroom and shower block, which felt like the height of luxury after some of the places we’d stayed before it.
They also have hotel rooms if you want a bit more luxury, or if you’re not driving a camper.
Etosha Omusati Lodge
Near Anderson Gate, Omusati has both a lodge and a campsite. We treated ourselves to a bungalow for a night, and honestly, it was such a good decision. Sometimes, you just need a proper bed and a door that locks.
The facilities are newer, the whole place feels a lot fresher than the camps inside the park, and there’s a pool, a bar, and a treetop viewing platform.

Self-Drive Tips for Etosha
Driving in Etosha was way easier than I expected (I tend to catastrophise anything that’s related to driving!), but these tips will help make the whole thing feel even smoother.
Road Conditions
When we were there, the roads were in pretty good shape. Near the entrance, there’s a short tarmac section, then it turns to gravel, but it had clearly been graded recently, so most of it was flat and easy.
The only time it got a bit sketchy was on a couple of smaller turn-offs to certain waterholes, but honestly, there are so many waterholes in the park that if one road looks too rough, just skip it and head to the next one.
The speed limit is 60km/h, but you’ll probably be driving slower than that anyway.
How to Do Waterholes Properly
You’re never going to get to all of them in a few days, and that’s fine. The first thing we did was ask at the gate and at camp which waterholes had been good lately.
When we were there, Tsumcor and Chudop were great for elephants, and Okondeka was good for big cats, and that held true for us. But wildlife moves around so much that you can honestly get lucky anywhere.
The biggest tip though? Just 👏 be 👏 patient. Just because a waterhole looks quiet when you pull up doesn’t mean something won’t wander over 10 minutes later.
And when you park, leave room for other cars and don’t block anyone’s view. Honestly, don’t be that dickhead. We came across a few, and it’s so frustrating.

Wildlife Etiquette
Give the animals space, don’t get in their way, and never try to edge closer than you should. If they wander near your car, amazing, but that should always be on their terms. Keep noise down too. The calmer the vibe, the more relaxed the wildlife tends to be.
If you’re stopping for a sighting, try not to brake suddenly or block the road awkwardly, and turn your engine off while you’re waiting. We’re in a climate and fuel crisis after all.
Fuel, Toilets, and Facilities
You can’t refuel inside Etosha, so fill up before you go in. It’s just a lot nicer starting the day full than doing fuel maths in your head mid-game drive.
- Anderson Gate: Petrosol at Etosha Outpost is the closest
- Von Lindequist Gate: Puma in Oshivelo, although we topped up in Tsumeb, and that was fine
- Galton Gate: the closest station is the Shell in Kamanjab
- King Nehale Gate: TotalEnergies in Omustegonime
For toilets and a leg stretch, make use of the main camps (Namutoni, Halali, Okaukuejo) when you’re passing through.
There are also a few gated picnic spots in the park, but they’re pretty spread out. We only came across two, both near Halali. And please close the gate behind you… you really don’t want to become someone’s lunch while eating yours.
There is WiFi at the camps, but when we were there, it didn’t reach the camping areas, it was mainly around the restaurant, and even then, it was pretty patchy.
Signal in general is quite limited across the park too, so just be prepared for a bit of a forced TikTok detox.
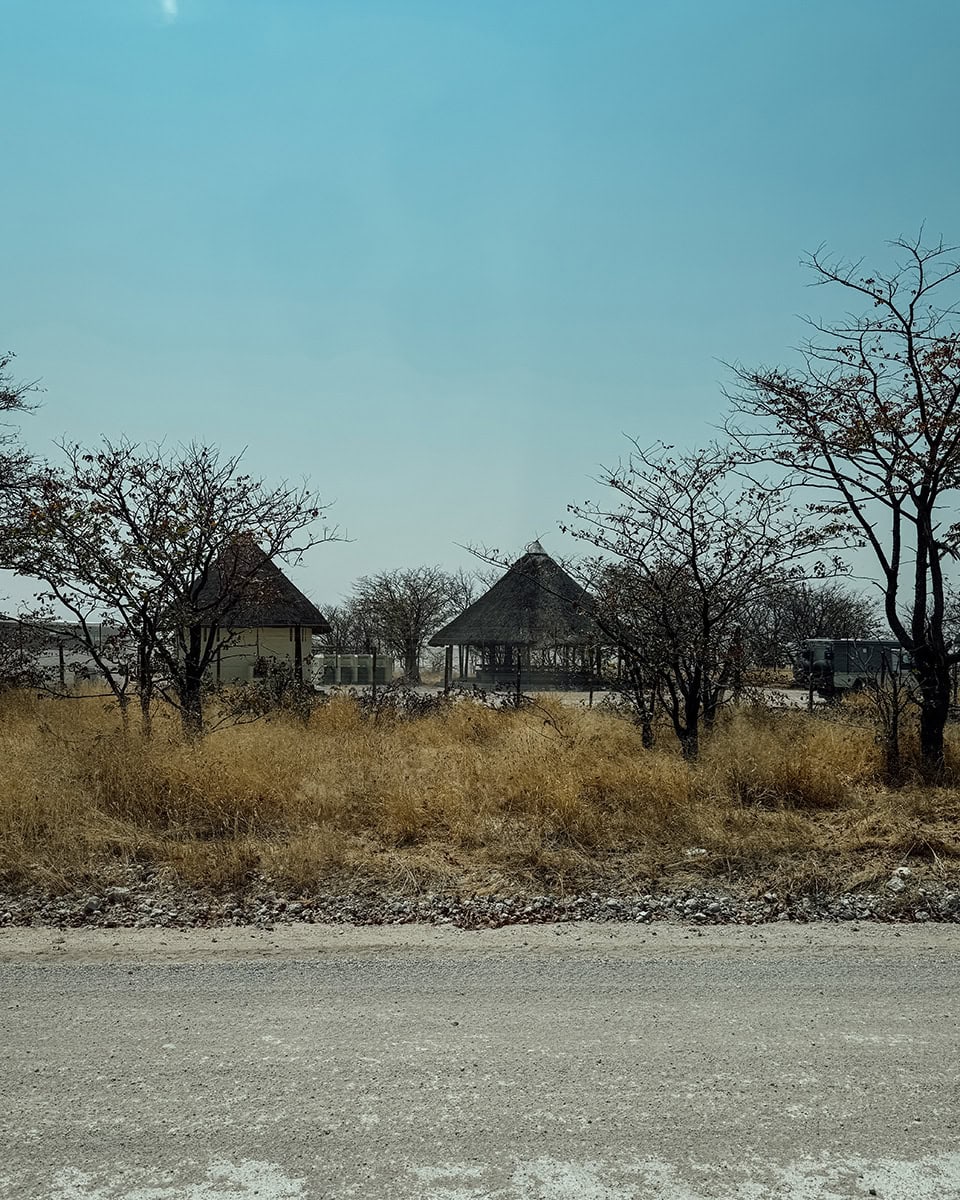
Why You Shouldn’t Drive at Night
Once it gets dark, wildlife gets a lot more active but also a lot harder to spot in time. Hitting an animal is the last thing anyone wants, and it can do serious damage to the animal, you, and the vehicle.
That’s why the gates close at sunset, whether you’re inside or outside the park. Just don’t risk it.
Bring Cash
You can use your card in most places across Namibia, but I’d still recommend having some cash on you. The internet can be a bit hit and miss (honestly, some of the worst WiFi we’ve had), so I wouldn’t rely on card payments alone.
It’s also just handy for things like tipping at campsites and the camp restaurants.
How to Spend Your Time in Etosha
Depending on how much time you have, you have two good options for seeing Etosha. Option A: Base yourself in one camp, or Option B: Cross the park over multiple nights.
We did Option B, but honestly, if we’d had less time, I’d have done Option A and stuck to one side of the park rather than trying to cram everything in and stressing out in the process.
Option A: Base Yourself in One Camp
If you’ve got less than 3 days, this is genuinely the smarter move, and I will die on this hill.
Pick either Okaukuejo or Namutoni, since they’re both closest to the gates, and use it as your base to properly explore the surrounding area. I’d say the furthest you should venture from either is Halali, which sits halfway through the park.
Basing Yourself at Namutoni
You’ll get a map when you enter the park, but if you’re based at Namutoni, here are the stops I’d prioritise in the surrounding area:
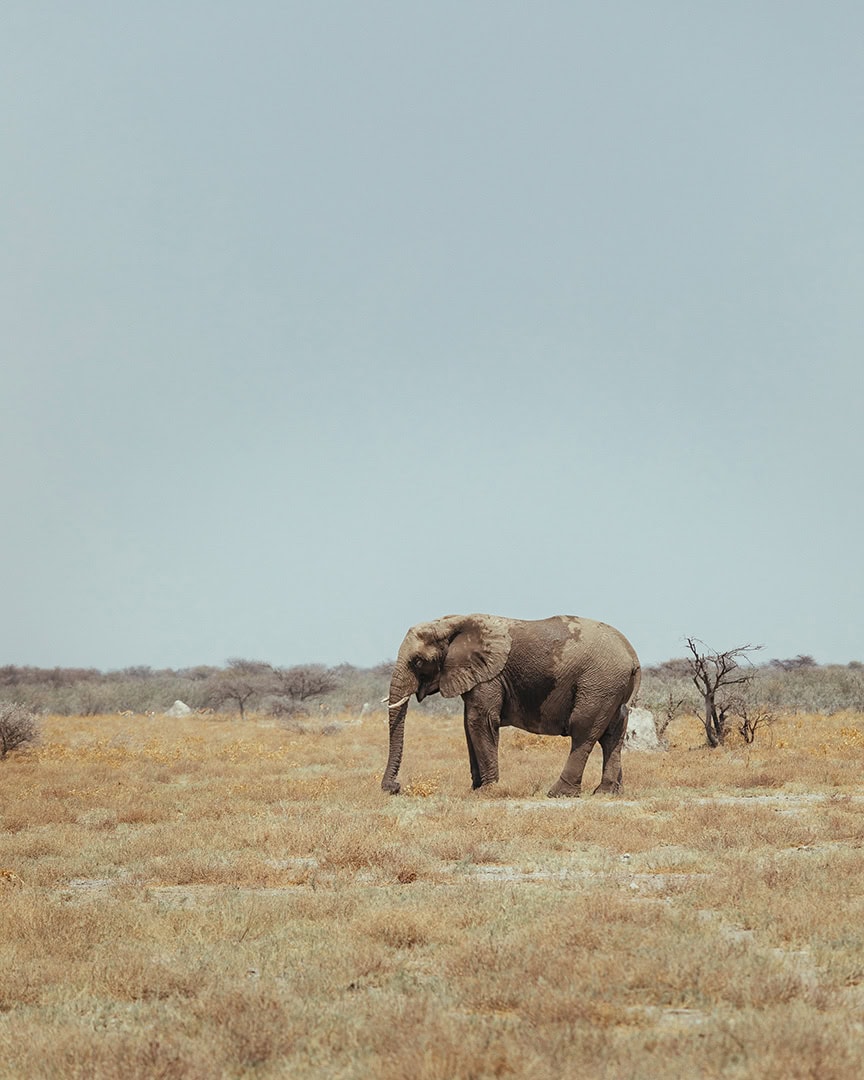
- Chudop was one of our favourites. We watched loads of elephants playing in the water here, which was just ridiculously cute.
- Tsumcor was absolutely packed when we visited, elephants, giraffes, antelopes, and oryx all at once. Definitely don’t skip this one.
- Namutoni camp waterhole is right on your doorstep if you’re staying here, and has a spotlight at night. We saw loads of elephants again, and I also spotted a small-spotted genet, which I was very smug about.
- Fischer’s Pan Drive is a big loop you can pick up from Namutoni. We did this early one morning, hoping for lions. We didn’t find any, but it was still a beautiful drive and absolutely worth doing.
- Moringa Waterhole is near Halali and is the halfway point in the park.
- Etosha Pan Lookout gives you a view over the pan, which will be dry in the dry season, but you can still spot wildlife crossing it, which is pretty special.
- Okerfontein is apparently a great spot for cheetahs and lions, need I say more?!
Basing Yourself at Okaukuejo
Again, you’ll get a map when you enter the park with all the waterholes, but if you’re based at Okaukuejo, these are the stops I’d make sure I include in my itinerary:
- Okaukuejo waterhole is right next to the campsite, and this is where black rhinos apparently come in at night. We saw both white and black rhinos near here!
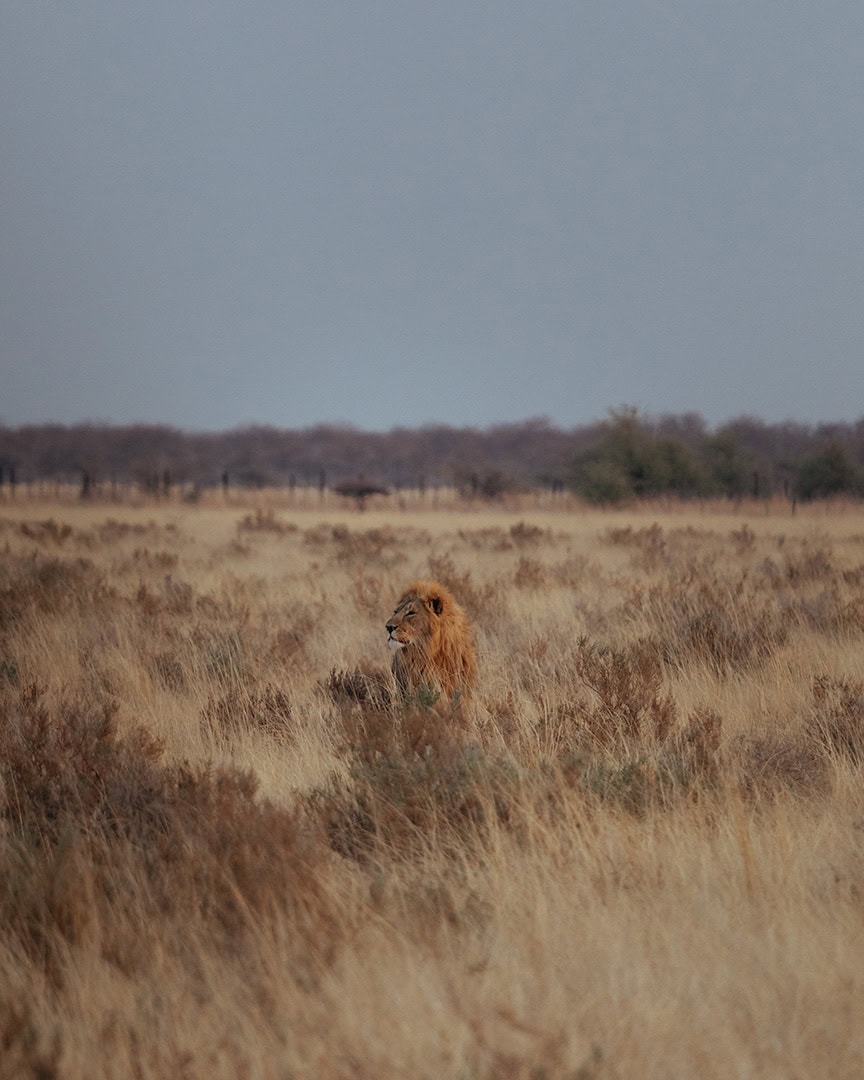
- Okondeka is past the vast open plains near Okaukuejo, and this is where we saw our lions. They were lying in the grass, so they were really hard to spot at first. Bring binoculars. We didn’t, and we almost missed them entirely.
- Moringa Waterhole is a good halfway point near Halali and is usually a pretty busy waterhole.
- Etosha Pan Lookout on this side gives you the other half of the pan. Same deal, dry in the dry season, but wildlife still crosses, and it’s a lovely spot.
- Olifantsbad is a solid stop for elephants, zebra, and giraffe, and lions and rhinos have been spotted here too.
- Ombika is right next to Anderson Gate, so if you’re entering from that side, you can swing straight in here. We did exactly that and were immediately greeted by loads of zebra and springbok, which is a pretty good start to any game drive.
- Rietfontein is near Halali. We saw loads of zebra when we were there, but it’s also known as a great spot for birdwatching, and leopards have apparently been seen here too!
Option B: Cross the Park Over Multiple Nights
If you’ve got 3 days or more, crossing the park is absolutely worth it!
Etosha is honestly one of the most incredible places, and seeing it this way means you get to experience a massive chunk of it without it feeling like a mad rush.
We went from Namutoni to Okaukuejo, but you can do it in either direction. It looks something like this:
- Night 1: Namutoni or Okaukuejo
- Night 2: Halali (smack in the middle of the park)
- Night 3: Whichever of Namutoni or Okaukuejo you didn’t start at
If you’ve got even longer, you could tie in a night at Onguma just outside Von Lindequist Gate near Namutoni, which I’d highly recommend anyway.
All the waterhole stops from Option A still apply here too, you’ll just have more time to actually get to both sides of the park and do a bit of side questing along the way.
Think of Option A as your must-visits, and anything extra as a bonus.

What to Pack for an Etosha
Here’s everything we had with us, plus a couple of things we definitely should have packed and absolutely did not:
- Binoculars — honestly, don’t be like us. We were zooming in on our cameras like absolute muppets and probably missed so much because of it.
- Camera with a zoom lens — the animals can be surprisingly far away, so if you’ve got a zoom lens, bring it. Your phone will work too, but zoom lenses are built for this.
- Spare batteries and a charger — you will be on your phone constantly, between maps, photos, and frantically googling what animal you’re looking at. Do not let it die mid-game drive.
- Water — it is hot, it is dusty, and game driving is thirstier work than you’d think. Bring more than you think you need.
- Snacks — you’re going to be out for hours, and the camps are spread out. Pack enough to keep yourself going between stops.
- Sunscreen — you’re in a car, yes, but if your windows are open, you will absolutely catch the sun. Don’t find out the hard way.
- Offline maps — signal is patchy in parts of the park, so download your maps before you go in.
- SIM card — it’s worth having a SIM card so you can check routes, contact your rental company, or call for help if anything goes wrong.
Ready to Self-Drive Etosha?
Honestly, if I can self-drive Etosha, you absolutely can too. My driving skills can be questionable at best, and I still came away having had one of the best wildlife experiences of my life. It’s so much less intimidating than it sounds, I promise.
There’s obviously still a bit of planning involved before you rock up to the gate, and if you’re anything like me, that’s the bit where your brain goes completely blank.
The actual driving and the wildlife spotting? Easy. The days before, when you’re trying to remember if you’ve packed everything, topped up the fuel, downloaded your offline maps, and charged all your gear? That’s where it gets a bit chaotic.
Trust me, a good checklist before you head in goes a long way. My free Etosha self-drive checklist covers everything you need to pack and sort before you go, so you can spend less time stressing in the car park of a Namibian supermarket and more time watching elephants splash around at the waterholes.